How I Fixed: ACF REST API cant_update_item

OK, hopefully this one is as easy to fix for you as it was for me. Easy being the typical (seemingly?) undocumented “one liner” that makes everything work.

In my example, I had just set up WordPress with ACF, added in ACF to REST API, and JWT Authentication for WP-API.

Essentially that gives a combo of admin UI to create and manage the custom fields, and then a REST API endpoint to GET, PUT, POST, etc.

The docs for getting the JWT Authentication plugin set up are good enough. Just a couple of additional define statements required in wp-config.php. Hopefully you have that sorted, and can log in:

curl -X POST \
  https://example.com/wp-json/jwt-auth/v1/token \
  -d '{
	"username": "my_wp_user",
	"password": "my_wp_users_password"
}'

// should return response, e.g. 

{
    "token": "aVeryLongStringHere",
    "user_email": "admin@example.com",
    "user_nicename": "my_wp_user",
    "user_display_name": "Admin Person Name"
}

Sweet. So far, so good.

Next, you need to add in at least one ACF custom field via your admin UI.

I’ve gone with a simple text field.

Even without authenticating, you should be able to hit your WP REST API and see the extra stuff added in by ACF:

curl -X GET \
  https://example.com/wp-json/wp/v2/pages/9

{
  "id": 9,
  "date": "2020-06-17T18:41:01",
  "date_gmt": "2020-06-17T17:41:01",
  "guid": {
  },
  "modified": "2020-06-25T09:13:20",
  "modified_gmt": "2020-06-25T09:15:44",
  "slug": "my-post-slug",
  "status": "publish",
  "type": "page",
  "link": "https://example.com/whatever/something",
  "title": {
  },
  "content": {
  },
  "excerpt": {
  },
  "author": 1,
  "featured_media": 0,
  "parent": 8,
  "menu_order": 0,
  "comment_status": "closed",
  "ping_status": "closed",
  "template": "page-templates/my-page-template.php",
  "meta": [],
  "acf": {
    "example_field": ""
  },
  "_links": {

  }
}

I’ve trimmed this right down. The interesting bit is the acf key / value. Make sure you see it.

The Problem

Things start to get interesting from here on in.

In order to update the post / page / whatever, we will need to be authenticated. We authenticated earlier, and got back a token. We need to pass that token as a Header on any requests that want to add / update data.

This is really easy – just add the header key of Authorization, and the value of Bearer your_token_from_earlier_goes_here. An example follows below.

But more importantly, as best I can tell, we need to use a special endpoint to update ACF fields.

For regular WP data, you might POST or PUT into e.g. https://example.com/wp-json/wp/v2/pages/9 to update data. Technically, PUT is more accurate when updating, and POST is for initial creation, but either seem to work.

curl -X POST \
  https://example.com/wp-json/wp/v2/pages/9 \
  -H 'authorization: Bearer aVeryLongStringHere' \
  -d '{
    "slug": "my-updated-slug"
}'

// which should return a full JSON response with the all the data, and the updated slug.

But if you try to update ACF this way, it just silently ignores your change:

curl -X POST \
  https://example.com/wp-json/wp/v2/pages/9 \
  -H 'authorization: Bearer aVeryLongStringHere' \
  -d '{
	"acf": {
	    "example_field": "some interesting update"
	}
}'

// it should 'work' - you get a 200 status code, and a full JSON response, but 'example_field' will not have updated.

My intuition says that seeing as we followed the response structure, this should have worked. But clearly, it doesn’t.

But it turns out that we need to use a separate endpoint for ACF REST API updates:

curl -X GET \
  https://example.com/wp-json/wp/v2/pages/9

// note again, no auth needed for this GET request

{
	"acf": {
	    "example_field": ""
	}
}

So this works, too. This only returns the acf field subset. But still, confusingly, the top level key is acf. And that’s what threw me.

See, if we try to make a POST or PUT following this shape:

curl -X POST \
  https://example.com/wp-json/wp/v2/pages/9 \
  -H 'authorization: Bearer aVeryLongStringHere' \
  -d '{
	"acf": {
	    "example_field": "some interesting update"
	}
}'

// fails, 500 error

{
    "code": "cant_update_item",
    "message": "Cannot update item",
    "data": {
        "status": 500
    }
}

And the same goes for if we drop the acf top level key:

curl -X POST \
  https://example.com/wp-json/wp/v2/pages/9 \
  -H 'authorization: Bearer aVeryLongStringHere' \
  -d '{ example_field": "some interesting update" }'

// fails, 500 error

{
    "code": "cant_update_item",
    "message": "Cannot update item",
    "data": {
        "status": 500
    }
}

The Solution

As I said at the start, this is a one liner. And as far as I could see, it’s not *clearly* documented. Maybe it’s in there somewhere. Maybe if you use WP day in, day out, you already know this. I don’t. And so I didn’t.

Hopefully this saves you some time:

curl -X POST \
  https://example.com/wp-json/wp/v2/pages/9 \
  -H 'authorization: Bearer aVeryLongStringHere' \
  -d '{
	"fields": {
            "example_field": "some interesting update"
      }
}'

// works, 200, response:

{
	"acf": {
	    "example_field": "some interesting update"
	}
}

And lo-and-behold, that works.

I think it’s super confusing that the field key is used on create / update, but the acf key is returned on read. Admittedly I have done this myself on API’s before – but as a consumer I now realise how unintuitive and frustrating that is.

Not Once, Not Twice, But Thrice

We’re apparently in for a lovely weekend of sunshine here in the UK. Perfect weather for sitting indoors coding 🙂

It’s been a busy week for me. I’ve had a long stint of travel, followed by busy days on a contract. In the evenings I’ve been fighting GitLab CI, which seems to have gone haywire. Builds are now taking hours to finish. I’ve unfortunately still not resolved this. There’s always some fun challenge to tackle.

On the plus side, thanks to the travel I did managed to see the Flying Scotsman here in Preston earlier this week:

Ok, enough ramble, on with the show…

Thrice Weekly

Over the last 4+ years of creating content for CodeReviewVideos.com I’ve tried a whole bunch of different approaches. I’m always trying to optimise my process and make things that touch more efficient, with the ultimate aim of delivering the most interesting and useful software development tutorials for you.

A number of people have asked why I “drip” out content. Typically, at least until the start of this year, I would release three videos a week: Monday, Wednesday, and Friday.

This approach worked well for me.

But, I got those emails frequently enough, asking why I didn’t either:

  • Release more videos, or;
  • Upload loads at once, rather than a few at a time

I had a definitive answer to the first question:
I can typically only get three videos done per week. Each video takes a lot of effort, from planning, to creating the initial code, to writing up that process, then recording, editing, uploading, and finally publishing. On average, for any minute you see on screen, it’s taken me about ~30 minutes to create.

The second question, however, I wasn’t sure on. The only way to find out would be to test the system.

As such, at the start of this year I decided I would switch to releasing blocks of content – an entire course at once, when it was done.

There’s a bunch of reasons why I don’t think this approach has worked. Probably the most disappointing for me, personally, is having had a number of subscribers cancel with feedback that I appeared to have abandoned the site. Heartbreaking.

Rather than dwell on this as a negative, I choose to take it as an experiment that didn’t work out. I’ve learned some lessons, and I know – more definitively, rather than just “gut feel” – that this is not the right process, for me.

As such, I have, in recent weeks, switched back to regular video updates. From now on, the previous approach of three videos per week will return.

Livestreams?

Something I’m considering at the moment is livestreaming things that I am working on. If you’ve ever watched Twitch, you’ll know the sort of thing I’m on about.

The main reason for this is to capture the thought process that I go through when writing code. I think this would be incredibly interesting to share. I do try to capture this when creating the more traditional content.

But even so, sometimes that exploratory stage holds big reasons as to why the code ended up as it did. This is much harder to cover in the traditional video approach.

For each of these livestreaming sessions I would record the screen as normal, along with the audio. I’m not sure how to capture chat as of yet, as the screen real estate is already extremely limited. I record at 1280×720, which is great for clarity of font etc, but severely limiting for real world dev. These things will need to be addressed.

This idea stemmed from this tweet:

There would also be no formal, written notes created for these videos. And each video would likely be ~1 hour long. I know this isn’t for everyone, but I’d be really grateful to hear your feedback on this idea.

Video Updates

This week saw three new videos added to the site:

Defining A Custom POST Route [API Platform]

One thing that I found initially confusing when working with the API Platform was in the creation of custom routes. In particular, in this video we address the issue of using a URI that differs from auto-generated route name / path that’s based off our underlying entity.

This is really useful, and I use this concept in every API Platform project I’ve created.

Finishing POST [API Platform]

In this video we finish up the POST implementation for our API Platform setup.

The number of videos required to get a POST endpoint working is a little misleading. We could have done this much quicker, but the Behat tests “dogfood” our API, and as such are making use of the POST endpoint also.

This is all about killing multiple birds with a single stone.

GET’ting One Resource [API Platform]

A major selling point, for me, of the API Platform is the rapid application development potential.

As mentioned above, the POST videos make this look a lot less rapid than it really can be. We had to take a care of a lot of setup / boilerplate for our testing in the previous few videos. Now we can spread our wings a little, and leverage a lot of the benefits that the API Platform provides in getting a brilliant API up and running, fast.

In the next few videos we will continue on with GET ‘ting multiple resources in one API call, PUT for updating existing resources, and DELETE for, well, I’m sure you can figure that one out yourself.

Have a Great Weekend!

Ok, that about wraps it up from me this week.

If you haven’t yet done so, please do come and say hi on the forum. It’s early days on there, but the discussions I’ve been involved with so far have been good fun. Here’s to more of them 🙂

Until next time, have a great weekend, and happy coding.

Chris

PayPal: Done; Discourse: Done; What’s Next?

I hope this post finds you well. It’s so lovely and sunny here in the UK, it’s (almost) a shame to be inside coding. I guess that’s what laptops are for, right? So you can still code whilst sat in the garden.

The last five weeks have been incredibly busy for me. Aside from starting a new role, I’ve managed to finally finish off a couple of big tasks that have been on my TODO list for waaaay too long. These are:

  • adding PayPal to the site
  • migrating away from Disqus commenting

I want to quickly cover both.

Adding PayPal

If you’ve been getting my mailings / reading the blog for any length of time, you’ll likely be sick of hearing about PayPal. When switching from the old Symfony-only implementation of CodeReviewVideos (version 1), I knew I’d want to offer more than just Stripe as a payment option. Therefore, I dutifully planned ahead and made the process of accepting payments as modular as possible, and made Stripe payment processing just one possible implementation.

This all worked absolutely fine. I was plenty comfortable with Stripe already, and had my original implementation to use as a reference.

What I did wrong, in hindsight, was base my implementation too heavily on Stripe.

To be clear, Stripe get a lot of things right. If you have to accept payments, working with Stripe’s API is a joy. It’s hard not of be influenced by how their system works.

As such, some of the ways I implemented things like the card details endpoint, the invoicing, and even little things like what data was being captured if using a `debug` level of logging were too heavily tied to Stripe.

The new subscribe form with PayPal option chosen

These things combined to make adding Braintree integration (aka PayPal’s API) take a lot longer than planned (~6 months, to my estimate of about 2-4 weeks). There were some other complications, such as getting my account approved was perhaps something I should have done upfront, but instead, I left this until I was about 8 weeks into development. In hindsight, if they had declined my application, I’d have wasted a lot of time. Not to mention, when I finally thought I might get rejected (it took a while, I got fearful) I stopped development entirely – for about 2 weeks.

The biggest mistake I made though was in the DB schema. Even though I knew upfront that I’d ultimately want to allow people to subscribe with PayPal, or Stripe, I made the relationship between a User account, and a Payment Information a one-to-one.

This was deployed to prod.

All worked fine when all I had was Stripe.

The problem dawned on me that if a User was paying with Stripe, then canceled their subscription, then rejoined with PayPal, then canceled again, and rejoined with Stripe, there was no way to get their previous payment info back. It sounds like an edge case, but if I’ve learned anything from CodeReviewVideos, it’s that all manner of unexpected circumstances can, and do arise. And more frequently than I’d ever have thought.

There was another issue. If a User was paying with Stripe, and then switched to PayPal, with a one-to-one setup they would lose their Stripe invoices. Again, major headaches.

So even when I’d finished the development, I still had a major migration ahead of me. And that consumed about 4 weeks in terms of planning, writing migration scripts, testing, setting up a whole new environment to test the thing end to end… phew, the work just kept on, and on.

Anyway, to cut a long story short, it’s done. The migration went well, and PayPal is now in prod. I think I celebrated by immediately cracking on with the Disqus migration. Ha.

Migrating To Discourse

One aspect of the CodeReviewVideos web site that I’ve never been happy with has been the use of Disqus.

There was a nasty user experience whereby you’d have to sign up once to use the site, and again – and entirely separately – to leave a comment. It sucked. But as far as pragmatic solutions go, it was good enough to get going.

I also read that Disqus would be enabling adverts on my comments section – though to the very best of my knowledge, that never happened. There was talk of a monthly fee. I don’t know. I don’t begrudge them charging for their service, but that wasn’t for me.

Adding Disqus wasn’t super easy, but at the same time, it wasn’t quite as hardcore as the PayPal change.

Surgical

The complications came by way of Single Sign On, hosting Discourse (via Docker), and replacing the existing comments.

Single Sign On wasn’t as bad as I’d expected. I thought that would be the hardest part. I found a Laravel package which I butchered crafted with surgical precision into something that worked nicely with Symfony.

Hosting Discourse wasn’t too bad. I use Rancher for my Docker container management, but Discourse’s Docker implementation just wasn’t playing ball. In the end I got a new VPS from Hetzner and hosted it there instead. There were some tweaks needed, but overall it wasn’t so bad.

Replacing the existing comments was the real tricky part. Disqus provide a one-way export – something I think is a bit weird. By which I mean you can export your data from Disqus, but they won’t let you revert to a previous ‘backup’. Anyway, I didn’t need that, I just needed the export, so that was fine and dandy.

Once I had the export I needed to get that data in to Docker, and then tweak the provided Disqus import script to run against my export. That all generally worked, but it only seems to have missed some of the comments off. I’m not sure why, but also I felt the end result was “good enough”.

The import worked by looking for any existing user, and then mapping a Disqus email address to the user’s Discourse email address. If the Disqus commentor never had a site membership, then now their comment will be assigned to some anonymous username like Disqus_312jklsdf2kl  or whatever. Not perfect, but again, good enough.

Now what happens is when I create a new video, the comments section automagically creates a new forum post under the username `chris`. As such, if you look at the forum today (and you should, because it’s ace), you’ll see I’ve been posting new topics like a mad man. This will slow down over the next few days.

As I write this I still have email functionality globally disabled on the forum. This will change, possibly over the weekend, once I’m suitably confident everything has settled down. You may recall receiving an email from the staging forum a few weeks back – yep, I made a boob there. Sorry about that. Once bitten, twice shy.

What’s Upcoming

I mentioned at the start that aside from the PayPal and Discourse changes, I have also recently started a new role.

Sometimes I get emails asking why I don’t have any new videos in a while, or why I haven’t updated X, Y, or Z to the latest and greatest. Believe me, I’d love to spend all day making new videos. Unfortunately CodeReviewVideos is not my full time job.

As some of you may know – I’m fairly open about it – I am a contractor by day.

One of the really nice things about being a contractor is getting to experience lots of different projects, in various scales of complexity, and reliability 🙂

I get a lot of interesting ideas for videos from my day-to-day work experiences. And this means that the content on CodeReviewVideos is very much about actionable, real world stuff you can use right now, today in your projects. It’s also battle tested / used in real world production websites.

There’s a bunch of videos I wrote up but haven’t had time to record as of yet. The reason I mention the whole day job thing is that it means I have only a fixed amount of time per week to devote to the site, and I have to prioritise tasks accordingly. Above all else, I prefer making videos. This is why I stared, and continue to run CodeReviewVideos. I love sharing, and from the feedback I get from so many of you (thank you!) you find it useful, too.

But of course, over the last few weeks I’ve had these other big site changes (dare I say, improvements) to make. And that has meant I haven’t been recording. Thankfully all that can change, and I can get back to making recording new stuff.
Ok cool – so what should be being recorded, all being well, is the continuation of the Beginners Guide to Back End (JSON API) + Front End Development [2018] series. Next up is the API Platform section, which I both really enjoyed building, and writing up, and am equally looking forwards to recording and sharing. It’s a good one.

Let’s hope this sunshine continues through the weekend, and for those of you in the UK, enjoy your bank holiday / extended weekend.

One final thing before I go: please do come and say hi on the forum.

Until next time, happy coding!

Chris

The 2018 Beginners Guide to Back End (JSON API) + Front End Development

It’s been a few weeks in the making, but I am happy now to reveal my latest course here on CodeReviewVideos:

The 2018 Beginners Guide to Back End (JSON API) + Front End Development.

This course will cover building a JSON-based API with the following back-end stacks:

  1. ‘raw’ Symfony 4 (PHP)
  2. Symfony 4 with FOSRESTBundle (PHP)
  3. API Platform (PHP)
  4. Koa JS (JavaScript / node)

Behat will be used to test all of these APIs. One Behat project, four different API implementations – in two different languages (PHP and JS).

We’re going to be covering the happy paths of GET , POST , PUT , (optionally) PATCH , and DELETE.

We’ll also be covering the unhappy paths. Error handling and display is just as important.

Where possible we’re going to try and use just one Behat feature file. It’s not always possible – the various implementations don’t always want to behave identically.

There’s a ton of good stuff covered in these videos. But the back end is only half the battle.

Whether you want to “catch them all”, or you’re working with a dedicated front-end dev, it’s definitely useful to know the basics of both.

With that in mind, you can pick and choose whether to implement the back-end, or front-end, or both.

If you don’t want to implement a back-end yourself, cloning any of the projects and getting an environment up and running is made as easy as possible by way of Docker. But you don’t need to use Docker. You can bring-your-own database, and do it that way, too.

The Front End

Whatever back end you decide to spin up, the front end should play nicely.

We’re going to implement a few different front-ends. The two I’m revealing today are:

  1. ‘raw’ JavaScript
  2. React

I have plans for a few others, but each implementation is a fair amount of work and I don’t want to over promise at this stage. There’s definitely at least two more coming, but let me first get these two on the site 🙂

The raw JavaScript approach aims to show how things were in the ‘bad old days‘. The days before your package manager  would take up ~7gb of your hard disk with its cache  directory.

The benefit of working this way is that there’s really no extra ‘stuff’ to get in the way. We can focus on making requests, and working with responses.

But that said, this is 2018 and the many modern JavaScript libraries and frameworks are fairly awesome. You’ll definitely get a renewed sense of appreciation for how much easier your life is once you’re comfortable using a library like React, after having done things the hard way.

Again, as mentioned we will cover more than just raw JS and React. Currently each implementation is between ten and fifteen videos. Each video takes a couple of hours to write up, and another couple of hours to record on average. I’m going as fast as I can, and will upload and publish as quickly as possible.

You can watch them as they drop right here.

Site Update

Behind the scenes over the past 10 weeks I have been working on integrating CodeReviewVideos with Braintree.
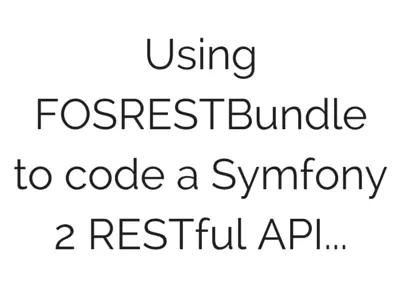
This is to enable support for PayPal.

I tried to create a ticket for everything I could think of ahead of starting development.

And I added a new ticket for any issue I hit during development. I’m not convinced I tracked absolutely everything, but even so I completely underestimated just how much work would be involved in this feature.

Being completely honest, I have never been more envious of Laravel’s Spark offering. For $99 they get Stripe and Braintree integration, and a whole bunch more. Staggering.

There’s a bunch of other new and interesting features in this release.

I’ve taken the opportunity to migrate from Symfony 3 to Symfony 4 for the API. There’s a bunch of new issues that arose during this transition – I hadn’t given it much prior thought, but with the new front controller (public/index.php) totally broke my Behat (app_acceptance.php) setup.

This work is also enabling the next major feature which I will start work on, once PayPal is live. More on that in my next update.

I appreciate that from the outside looking in, there doesn’t seem to have been a great deal of activity on the site over the last few weeks. I can assure you that behind the scenes, there has never been more activity.

Have A Great Weekend

Ok, that’s about it from me for the moment.

As ever, have a great weekend, and happy coding.

p. s. – I would be extremely grateful if you could help me spread the word by clicking here to tweet about the new course.

FOSRESTBundle for REST API

FOSRESTBundle is a tool to help you in the job of creating a REST API with Symfony2. Let’s take a closer look at what it all really means and where to download it and get started.

What is FOS?

FOS stands for Friends of Symfony. It’s a group of people who begun collaborating on the KNP Labs User Bundle. They decided to create a dedicated space for Bundles that they maintained as a group. Over time this has led to many more popular bundles being created via the group.

Check out the Friends of Symfony GitHub to see the bundles available.

What is REST?

REST stands for Representational State Transfer. It is resource-based rather than action-based. In a RESTful API, we’re talking about things instead of actions.

REST typically runs over HTTP (Hypertext Transfer Protocol) and has several architectural constraints:

It decouples consumers from producers.

It leverages a layered system.

It leverages a uniform interface.

Able to leverage a cache.

Stateless existence.

Features of the FOSRESTBundle

The FOSRESTBundle gives us great tools to allow the quick development of RESTful API’s and applications using Symfony2. Once you have confidence in using it, you’ll quickly find so many other possibilities become available including apps, Angular JS front-ends and as well as other opportunities.

Some key features include:

  • Generate URLs following REST conventions using a custom route loader.
  • Accept header format negotiation.
  • It has an exception controller used for sending HTTP status codes.
  • RESTful decoding of HTTP request body and accept headers.
  •  View layer for allowing output and format agnostic controllers.

Benefits of FOSRESTBundle

REST is likely to keep growing as more and more businesses seek open, well-defined interfaced for developing applications and infrastructure services. It’s very useful and worthwhile to learn.

Advantages of learning REST include:

  • It is designed for using over Open Internet/Web. It’s a better choice for web scale applications and cloud-based platforms compared to SOAP (Simple Object Access Protocol) and is often the choice for the architecture of internet services these days.
  • RESTful web services are easily leveraged by most tools.
  • REST forbids conversational state, meaning we can scale very wide with the addition of server nodes behind a load balancer.

Getting Started with FOSRESTBundle:

You can find the FOSRESTBundle here. Installation is a quick one step process. There are six main sections on the download page to look over before you begin. Check out the config references too, and there are also some example applications too that can be used as a guideline.

FOSRESTBundle

Ready to learn to code a RESTful API?

In our RESTful API course using FOSRESTBundle, you can watch and learn how to set up, configure and implement a REST API. Sometimes it’s easier watching than trying to figure stuff out for yourself, plus you can also ask questions!

The course covers all of the basics such as GET, POST, PUT and DELETE. This is along with handling related data collections, leveraging the Symfony2 Forms component, and very importantly, this is all done using test driven development techniques. Let’s get cracking and we hope to see you on the inside!