How I Fixed: ACF REST API cant_update_item

OK, hopefully this one is as easy to fix for you as it was for me. Easy being the typical (seemingly?) undocumented “one liner” that makes everything work.

In my example, I had just set up WordPress with ACF, added in ACF to REST API, and JWT Authentication for WP-API.

Essentially that gives a combo of admin UI to create and manage the custom fields, and then a REST API endpoint to GET, PUT, POST, etc.

The docs for getting the JWT Authentication plugin set up are good enough. Just a couple of additional define statements required in wp-config.php. Hopefully you have that sorted, and can log in:

curl -X POST \
  https://example.com/wp-json/jwt-auth/v1/token \
  -d '{
	"username": "my_wp_user",
	"password": "my_wp_users_password"
}'

// should return response, e.g. 

{
    "token": "aVeryLongStringHere",
    "user_email": "admin@example.com",
    "user_nicename": "my_wp_user",
    "user_display_name": "Admin Person Name"
}

Sweet. So far, so good.

Next, you need to add in at least one ACF custom field via your admin UI.

I’ve gone with a simple text field.

Even without authenticating, you should be able to hit your WP REST API and see the extra stuff added in by ACF:

curl -X GET \
  https://example.com/wp-json/wp/v2/pages/9

{
  "id": 9,
  "date": "2020-06-17T18:41:01",
  "date_gmt": "2020-06-17T17:41:01",
  "guid": {
  },
  "modified": "2020-06-25T09:13:20",
  "modified_gmt": "2020-06-25T09:15:44",
  "slug": "my-post-slug",
  "status": "publish",
  "type": "page",
  "link": "https://example.com/whatever/something",
  "title": {
  },
  "content": {
  },
  "excerpt": {
  },
  "author": 1,
  "featured_media": 0,
  "parent": 8,
  "menu_order": 0,
  "comment_status": "closed",
  "ping_status": "closed",
  "template": "page-templates/my-page-template.php",
  "meta": [],
  "acf": {
    "example_field": ""
  },
  "_links": {

  }
}

I’ve trimmed this right down. The interesting bit is the acf key / value. Make sure you see it.

The Problem

Things start to get interesting from here on in.

In order to update the post / page / whatever, we will need to be authenticated. We authenticated earlier, and got back a token. We need to pass that token as a Header on any requests that want to add / update data.

This is really easy – just add the header key of Authorization, and the value of Bearer your_token_from_earlier_goes_here. An example follows below.

But more importantly, as best I can tell, we need to use a special endpoint to update ACF fields.

For regular WP data, you might POST or PUT into e.g. https://example.com/wp-json/wp/v2/pages/9 to update data. Technically, PUT is more accurate when updating, and POST is for initial creation, but either seem to work.

curl -X POST \
  https://example.com/wp-json/wp/v2/pages/9 \
  -H 'authorization: Bearer aVeryLongStringHere' \
  -d '{
    "slug": "my-updated-slug"
}'

// which should return a full JSON response with the all the data, and the updated slug.

But if you try to update ACF this way, it just silently ignores your change:

curl -X POST \
  https://example.com/wp-json/wp/v2/pages/9 \
  -H 'authorization: Bearer aVeryLongStringHere' \
  -d '{
	"acf": {
	    "example_field": "some interesting update"
	}
}'

// it should 'work' - you get a 200 status code, and a full JSON response, but 'example_field' will not have updated.

My intuition says that seeing as we followed the response structure, this should have worked. But clearly, it doesn’t.

But it turns out that we need to use a separate endpoint for ACF REST API updates:

curl -X GET \
  https://example.com/wp-json/wp/v2/pages/9

// note again, no auth needed for this GET request

{
	"acf": {
	    "example_field": ""
	}
}

So this works, too. This only returns the acf field subset. But still, confusingly, the top level key is acf. And that’s what threw me.

See, if we try to make a POST or PUT following this shape:

curl -X POST \
  https://example.com/wp-json/wp/v2/pages/9 \
  -H 'authorization: Bearer aVeryLongStringHere' \
  -d '{
	"acf": {
	    "example_field": "some interesting update"
	}
}'

// fails, 500 error

{
    "code": "cant_update_item",
    "message": "Cannot update item",
    "data": {
        "status": 500
    }
}

And the same goes for if we drop the acf top level key:

curl -X POST \
  https://example.com/wp-json/wp/v2/pages/9 \
  -H 'authorization: Bearer aVeryLongStringHere' \
  -d '{ example_field": "some interesting update" }'

// fails, 500 error

{
    "code": "cant_update_item",
    "message": "Cannot update item",
    "data": {
        "status": 500
    }
}

The Solution

As I said at the start, this is a one liner. And as far as I could see, it’s not *clearly* documented. Maybe it’s in there somewhere. Maybe if you use WP day in, day out, you already know this. I don’t. And so I didn’t.

Hopefully this saves you some time:

curl -X POST \
  https://example.com/wp-json/wp/v2/pages/9 \
  -H 'authorization: Bearer aVeryLongStringHere' \
  -d '{
	"fields": {
            "example_field": "some interesting update"
      }
}'

// works, 200, response:

{
	"acf": {
	    "example_field": "some interesting update"
	}
}

And lo-and-behold, that works.

I think it’s super confusing that the field key is used on create / update, but the acf key is returned on read. Admittedly I have done this myself on API’s before – but as a consumer I now realise how unintuitive and frustrating that is.

No Time For a REST

Phew, it’s been another red hot, football-filled week here in the UK. I’m sure for some of you, 29°C is positively chilly. But for me, it’s been baking. Not helped by an evil selection of naughty wasps making camp outside my window, forcing me to work without fresh air. Lovely.

Anyway, I’m sure you don’t tune in for weather updates, or for my views on the Sports Ball. Let’s get back to the good stuff.

Do You GraphQL?

One of the most interesting bits of tech about at the moment, in my opinion, is GraphQL.

GraphQL, briefly, is an alternative to REST. The main difference between ‘REST’ and GraphQL being that we – as consumers – can specify exactly which bits of data we want / need, and the server returns just the things we care about, and nothing more.

Also, you only need one endpoint with GraphQL, as often opposed to many with ‘REST’.

Now, I put REST in inverted commas as the typical RESTful API’s that I both create, and work with, are not truly RESTful. Pragmatism, and all that. That’s why I’ve more typically started referring to these types of API’s as JSON APIs.

But I digress.

Like every new piece of tech, there are often a bunch of advocates shouting loudly, particularly on sites like Twitter, about how if you’re not using GraphQL then you’re basically a dinosaur.

how-to-graphqlThen recently – I think maybe a few weeks ago – I came across a really interesting website about GraphQL. It’s called How To GraphQL.

Why I like the site is that there are some generic introduction tutorials, and then some more language specific tutorials. There’s React for the front end, along with Node and Elixir on the back end. No PHP, mind. More on that in a second. I chose the Elixir tutorial, and enjoyed playing around with it.

After playing around with the Elixir back end implementation I’d created, I wondered how this might translate into PHP. I was already aware that the API Platform can support GraphQL so used that as a starting point. I kept my implementation identical (well, as close as) to the setup in the How To GraphQL Elixir tutorial. The idea being that I could switch out the two, and the front end shouldn’t care.

It turned out to be a really interesting exercise. I’d be happy to share my code if anyone has any interest? There’s nothing fancy there, but it was a fun learning experience for me.

What I did find most interesting was in that Dunglas, the creator of the API Platform (and many other cool things – very clever guy, well worth following), isn’t quite the GraphQL advocate I expected. These two tweet threads are interesting reading:

and:

I’d be really interested to hear about your experiences with GraphQL.

Video Update

This week saw three new videos added to the site:

GET’ting Multiple Resources [API Platform]

I mentioned last week that in many ways I’ve been doing the API Platform a disservice.

In taking as many videos as I have to show a single end point API I may have made things look more difficult than they really are.

We’ve used this setup as an excuse to cover some interesting, and useful / commonly needed things such as customisation of your route paths, and defining custom operations (the Health check).

If you don’t need to customise anything, getting an API up and running using the API Platform is really remarkably rapid.

All that said, I stand by this approach. We’ve played around with some cool features. This is all stuff that will help you in the real world.

PUT to Update Existing Data [API Platform]

The API Platform takes an interesting approach to the process of updating existing data.

There’s no implementation of PATCH , the most controversial / complex HTTP Verb. And that’s fine. Less controversy is always a good thing, imo. Besides which, the more I work with the front end, the less I find any use for PATCH  anyway. Typically I will have the full resource, so making full updates to that resource is easy enough.

We cover a little potential gotcha in the way that API Platform differs from the Symfony 4 JSON API, and Symfony 4 with FOSRESTBundle approaches. This is in the status code returned by the API Platform, and why they may choose to do this.

DELETE to Remove Data [API Platform]

Adding an implementation for DELETE  is probably the easiest of the whole lot. This is partly because we’ve done all the hard work already. But also because deleting stuff just works. There’s very little to it.

Now, in the real world you’d probably want to restrict who can and can’t delete, and things get a little more complex. But the underlying operation itself is very straightforward.

There’s just one thing left to do with our API Platform setup, and that’s handle the error paths. We’ll get on to that in the final video in this part of the series.

Live Stream Update

I’ve recorded the first “live stream”. It’s on my laptop, waiting for a touch of editing. I need to mask a few bits of config due to security reasons.

I also hit on a proper issue. The domain I was planning to launch under has expired. And worse, because I let it expire and didn’t renew it, it’s gone into grace period. And now Namecheap want $108 to reactivate it. Silly me.

Ok, so this may delay the launch of the thing in the real world. It’s not going to stop me writing the code. I wanted to get this video out this week. It will slip into next week. Fortunately (depending on how you look at it), I have a couple of long train journeys on Monday and Tuesday evening next week. The perfect time to edit videos – even if it does draw a few funny looks.

As a reminder, the live stream stuff will not be getting a write up. These will be video only, but you’re more than welcome to raise questions, or ask to see more detail etc. I’ll share all that via the forum.

Ok, that about wraps it up from me this. As ever, have a great weekend, and happy coding.

Chris

The 2018 Beginners Guide to Back End (JSON API) + Front End Development

It’s been a few weeks in the making, but I am happy now to reveal my latest course here on CodeReviewVideos:

The 2018 Beginners Guide to Back End (JSON API) + Front End Development.

This course will cover building a JSON-based API with the following back-end stacks:

  1. ‘raw’ Symfony 4 (PHP)
  2. Symfony 4 with FOSRESTBundle (PHP)
  3. API Platform (PHP)
  4. Koa JS (JavaScript / node)

Behat will be used to test all of these APIs. One Behat project, four different API implementations – in two different languages (PHP and JS).

We’re going to be covering the happy paths of GET , POST , PUT , (optionally) PATCH , and DELETE.

We’ll also be covering the unhappy paths. Error handling and display is just as important.

Where possible we’re going to try and use just one Behat feature file. It’s not always possible – the various implementations don’t always want to behave identically.

There’s a ton of good stuff covered in these videos. But the back end is only half the battle.

Whether you want to “catch them all”, or you’re working with a dedicated front-end dev, it’s definitely useful to know the basics of both.

With that in mind, you can pick and choose whether to implement the back-end, or front-end, or both.

If you don’t want to implement a back-end yourself, cloning any of the projects and getting an environment up and running is made as easy as possible by way of Docker. But you don’t need to use Docker. You can bring-your-own database, and do it that way, too.

The Front End

Whatever back end you decide to spin up, the front end should play nicely.

We’re going to implement a few different front-ends. The two I’m revealing today are:

  1. ‘raw’ JavaScript
  2. React

I have plans for a few others, but each implementation is a fair amount of work and I don’t want to over promise at this stage. There’s definitely at least two more coming, but let me first get these two on the site 🙂

The raw JavaScript approach aims to show how things were in the ‘bad old days‘. The days before your package manager  would take up ~7gb of your hard disk with its cache  directory.

The benefit of working this way is that there’s really no extra ‘stuff’ to get in the way. We can focus on making requests, and working with responses.

But that said, this is 2018 and the many modern JavaScript libraries and frameworks are fairly awesome. You’ll definitely get a renewed sense of appreciation for how much easier your life is once you’re comfortable using a library like React, after having done things the hard way.

Again, as mentioned we will cover more than just raw JS and React. Currently each implementation is between ten and fifteen videos. Each video takes a couple of hours to write up, and another couple of hours to record on average. I’m going as fast as I can, and will upload and publish as quickly as possible.

You can watch them as they drop right here.

Site Update

Behind the scenes over the past 10 weeks I have been working on integrating CodeReviewVideos with Braintree.
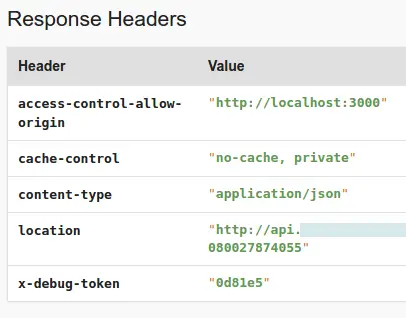
This is to enable support for PayPal.

I tried to create a ticket for everything I could think of ahead of starting development.

And I added a new ticket for any issue I hit during development. I’m not convinced I tracked absolutely everything, but even so I completely underestimated just how much work would be involved in this feature.

Being completely honest, I have never been more envious of Laravel’s Spark offering. For $99 they get Stripe and Braintree integration, and a whole bunch more. Staggering.

There’s a bunch of other new and interesting features in this release.

I’ve taken the opportunity to migrate from Symfony 3 to Symfony 4 for the API. There’s a bunch of new issues that arose during this transition – I hadn’t given it much prior thought, but with the new front controller (public/index.php) totally broke my Behat (app_acceptance.php) setup.

This work is also enabling the next major feature which I will start work on, once PayPal is live. More on that in my next update.

I appreciate that from the outside looking in, there doesn’t seem to have been a great deal of activity on the site over the last few weeks. I can assure you that behind the scenes, there has never been more activity.

Have A Great Weekend

Ok, that’s about it from me for the moment.

As ever, have a great weekend, and happy coding.

p. s. – I would be extremely grateful if you could help me spread the word by clicking here to tweet about the new course.

Conditional SerializerGroup in FOSRESTBundle

I needed to conditionally add an entry to the list of active Serializer Group entries in a FOSRESTBundle controller action.

Here’s my attempt:

    /**
     * Get a single Widget.
     *
     * @Annotations\Get(path="/widget/{id}")
     *
     * @ApiDoc(
     *   output = "AppBundle\Entity\Widget",
     *   statusCodes = {
     *     200 = "Returned when successful",
     *     404 = "Returned when not found"
     *   }
     * )
     *
     * @param int         $id    the widget slug
     *
     * @Annotations\View(serializerGroups={
     *     "Default",
     *     "timestamps",
     *     "widgets_all",
     *     "feature_summary",
     *     "sprocket_summary"
     * })
     *
     * @return View
     */
    public function getAction(int $id, WidgetRepository $widgetRepository)
    {
        $widget = $widgetRepository->findOneById($id);

        if ($widget === null) {
            return new View(null, Response::HTTP_NOT_FOUND);
        }

        $view = $this->view($widget, Response::HTTP_OK);

        if ($this->isGranted(WidgetVoter::VIEW, $widget->getSprocket())) {
            $view->getContext()->addGroup('sprocket_all');
        }

        return $view;
    }

The idea behind this code is to that a Widget should show all of its information to all users.

It should show a summary of related features to all users.

It should show a summary of the related sprocket (one-to-one) to all users.

However, if you are logged in, you should see all the sprocket information, not just a summary.

It seems to work quite well in my use case. Gotta love them sprockets!

How I Fixed: Missing Headers on Response in Symfony 3 API

The first time this caught me out, I didn’t feel so bad. The second time – i.e. just now – I knew I had already solved this problem (on a different project), and found my urge to kill rising.

I wanted to POST in some data, and if the resource is successfully created, then the response should contain a link – via a HTTP header – to the newly created resource.

Example PHP / Symfony 3 API controller action code snippet:

    public function postAction(Request $request)
    {
        $form = $this->createForm(MyResourceType::class, null, [
            'csrf_protection' => false,
        ]);

        $form->submit($request->request->all());

        if (!$form->isValid()) {
            return $form;
        }

        $myResource = $form->getData();

        $em = $this->getDoctrine()->getManager();
        $em->persist($myResource);
        $em->flush();

        $routeOptions = [
            'id'      => $myResource->getId(),
            '_format' => $request->get('_format'),
        ];

        return $this->routeRedirectView(
            'get_myresource', 
            $routeOptions, 
            Response::HTTP_CREATED
        );
    }

And from the front end, something like this:

export async function createMyResource(important, info, here) {

  const baseRequestConfig = getBaseRequestConfig();

  const requestConfig = Object.assign({}, baseRequestConfig, {
    method: 'POST',
    body: JSON.stringify({
      important,
      info,
      here
    })
  });

  /* global API_BASE_URL */
  const url = API_BASE_URL + '/my-resource';

  const response = await asyncFetch(url, requestConfig);

  return {
    myResource: {
      id: response.headers.get('Location').replace(`${url}/`, '')
    }
  };
}

Now, the interesting line here – from my point of view, at least – is the final line.

Because this is a newly created resource, I won’t know the ID unless the API tells me. In the Symfony controller action code, the routeRedirectView  will take care of this for me, adding on a Location header pointing to the new resource / record.

I want to grab the Location  from the Headers returned on the Response and by removing the part of the string that contains the URL, I can end up with the new resource ID. It’s brittle, but it works.

Only, sometimes it doesn’t work.

Response
body:(...)
bodyUsed: false
headers: Headers
  __proto__: Headers
ok:true
status:201
statusText:"Created"
type:"cors"
url:"http://api.my-api.dev/app_dev.php/my-resource"
__proto__:Response

Excuse the formatting.

From JavaScript’s point of view, the Headers array is empty.

This leads to an enjoyable error: “Cannot read property ‘replace’ of null”.

Confusingly, however, from the Symfony profiler output from the very same request / response, I can see the header info is there:

Good times.

Ok, so the solution to this is really simple – when you know the answer.

Just expose the Location  header 🙂

# /app/config/config.yml

# Nelmio CORS
nelmio_cors:
    defaults:
        allow_origin:  ["%cors_allow_origin%"]
        allow_methods: ["POST", "PUT", "GET", "DELETE", "OPTIONS"]
        allow_headers: ["content-type", "authorization"]
        expose_headers: ["Location"] # this being the important line
        max_age:       3600
    paths:
        '^/': ~

After that, it all works as expected.