Make Your Own Controller
Towards the end of the previous video we had created a single route which, when accessed, would render out the contents of our template (e.g. the hello_page.html.twig), and return that as the body of the Response.
Whilst we didn't need to create our own Controller class, or controller method (in prior Symfony versions most often called an Action) to make this work, we did use a Symfony provided Controller (TemplateController) and Action (templateAction) behind the scenes.
I also mentioned that in 99% of cases, you would likely not work in this way, in the real world.
Still, it is interesting to know of this feature, and also it saved us from having to do anything more than we otherwise had to, in order to get started.
Lets now create our own Controller class, and in that controller we will create our very first controller Method.
Making A Controller Class
There are a bunch of ways to create a new Controller class.
We could:
- Copy and paste code from the docs
- Manually type everything out from memory
- Create and use a Live Template
- Copy / paste a controller class from an existing project
And so on.
Or, and perhaps easiest, we can make one:
php bin/console

# ...

 make
  make:auth                               Creates an empty Guard authenticator
  make:command                            Creates a new console command class
  make:controller                         Creates a new controller class
  make:entity                             Creates a new Doctrine entity class
  make:form                               Creates a new form class
  make:functional-test                    Creates a new functional test class
  make:serializer:encoder                 Creates a new serializer encoder class
  make:subscriber                         Creates a new event subscriber class
  make:twig-extension                     Creates a new Twig extension class
  make:unit-test                          Creates a new unit test class
  make:validator                          Creates a new validator and constraint class
  make:voter                              Creates a new security voter class
What this means is we can type in php bin/console make:controller, and follow the prompt to create a basic controller, and a 'demo' action.
Let's try it:
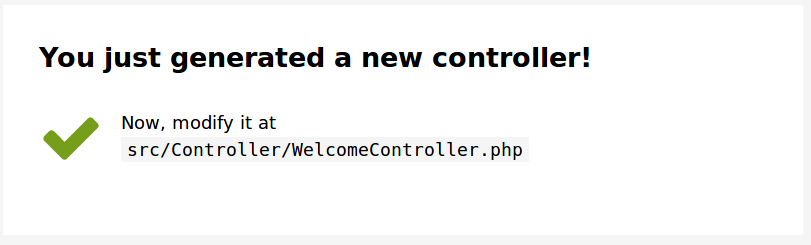
php bin/console make:controller

 Choose a name for your controller class (e.g. BravePuppyController):
 > WelcomeController

 created: src/Controller/WelcomeController.php

  Success!

 Next: Open your new controller class and add some pages!
Now if we look in our app, under the src/Controller directory, we do indeed see WelcomeController.php.
The contents of WelcomeController.php are:
<?php

namespace App\Controller;

use Sensio\Bundle\FrameworkExtraBundle\Configuration\Route;
use Symfony\Bundle\FrameworkBundle\Controller\Controller;
use Symfony\Component\HttpFoundation\Response;

class WelcomeController extends Controller
{
    /**
     * @Route("/welcome", name="welcome")
     */
    public function index()
    {
        // replace this line with your own code!
        return $this->render('@Maker/demoPage.html.twig',
          'path' => str_replace($this->getParameter('kernel.project_dir').'/', '', __FILE__)
        ]);
    }
}
I've taken the slight liberty of adjusting the formating of the return statement for ease of reading. The actual generated code will be on a single line.
There's a bunch of interesting things happening in this code, and whilst it would be cool to dive into each part, it would also make things more complex than they need be at this point.
What I will suggest is that we make two quick changes to the generated code:
- Remove the
use Symfony\Component\HttpFoundation\Response;line - Change
extends Controllertoextends AbstractController
Removing use Symfony\Component\HttpFoundation\Response; is easy enough. It's unused, so we can simply delete the entire line. I'm not sure why it's provided in the generated output, and it may not be in future versions.
Next, change:
use Symfony\Bundle\FrameworkBundle\Controller\Controller;
to:
use Symfony\Bundle\FrameworkBundle\Controller\AbstractController;
And update:
class WelcomeController extends Controller
to:
class WelcomeController extends AbstractController
Whilst not something we will immediately cover, this is a recommended Best Practice for Symfony Controllers. We'll cover what this change does a little later on.
Routin' Tootin'
For the rest of this video we will focus on that new route that is now available in our application, thanks to the routing Annotation generated for us:
    /**
     * @Route("/welcome", name="welcome")
     */
    public function index()
This routing annotation maps the route or path of /welcome to the index method.
Geek Trivia: If you're coming from Symfony 2 or Symfony 3, you may wonder what happened to the Action suffix, as in indexAction. This is possible as our WelcomeController is a service.
We can double check this route is correctly configured by running the bin/console debug:router command again:
bin/console debug:router
 -------------------------- -------- -------- ------ -----------------------------------
  Name                       Method   Scheme   Host   Path
 -------------------------- -------- -------- ------ -----------------------------------
  welcome                    ANY      ANY      ANY    /welcome
  _twig_error_test           ANY      ANY      ANY    /_error/{code}.{_format}
  _wdt                       ANY      ANY      ANY    /_wdt/{token}
  _profiler_home             ANY      ANY      ANY    /_profiler/
  _profiler_search           ANY      ANY      ANY    /_profiler/search
  _profiler_search_bar       ANY      ANY      ANY    /_profiler/search_bar
  _profiler_phpinfo          ANY      ANY      ANY    /_profiler/phpinfo
  _profiler_search_results   ANY      ANY      ANY    /_profiler/{token}/search/results
  _profiler_open_file        ANY      ANY      ANY    /_profiler/open
  _profiler                  ANY      ANY      ANY    /_profiler/{token}
  _profiler_router           ANY      ANY      ANY    /_profiler/{token}/router
  _profiler_exception        ANY      ANY      ANY    /_profiler/{token}/exception
  _profiler_exception_css    ANY      ANY      ANY    /_profiler/{token}/exception.css
  hello_page                 ANY      ANY      ANY    /hello
 -------------------------- -------- -------- ------ -----------------------------------
It's not immediately obvious, but the new route is at the top, and our existing route is at the bottom.
If you haven't already done so, head over to http://127.0.0.1:8000/welcome and check out your shiny new controller output:
So far, so good.
Changing Things Up
Let's set our new controller action to respond on the root of our site. In other words, let's set this controller to respond to /.
This is easily achieved. We just need to update the routing annotation:
    /**
     * @Route("/", name="welcome")
     */
    public function index()
Don't hesitate to re-check the output of bin/console debug:router when making changes. If you see the change in your console output, you know Symfony understood and accepted your change.
Next, rather than rendering out the generated template, let's create a new one of our own.
We're going to make use of Bootstrap 4. Feel free to change this up to be any CSS framework you like. Or just skip the CSS, if visuals aren't your cup of tea.
We'll start by creating a new template inside a subdirectory of the templates directory:
mkdir templates/welcomeAnd into the new templates/welcome directory we will create a new template, index.html.twig:
touch templates/welcome/index.html.twigThis name matches that of our Controller method, but it doesn't have to. On bigger projects, a naming convention like this will make your life a little easier. Use whatever you see fit, of course.
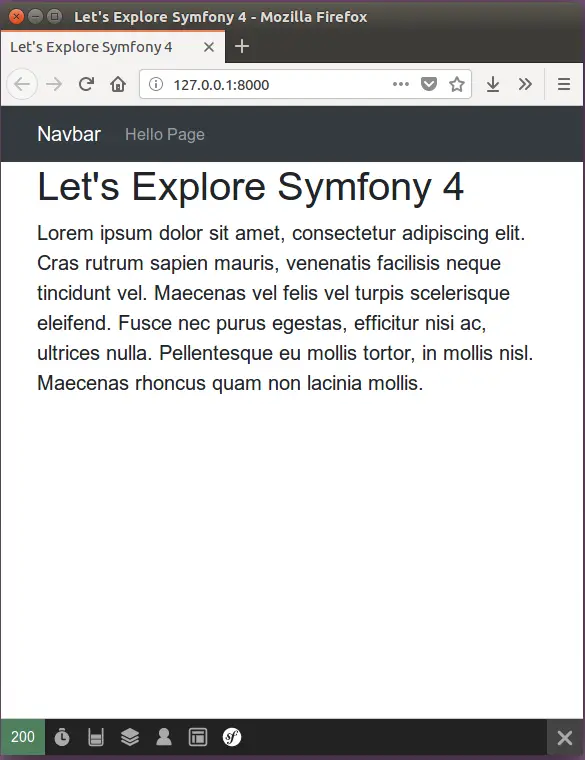
Bootstrap offer a few example templates, and I've slightly customised one of these for the following:
<!doctype html>
<html lang="en">
<head>
    <meta charset="utf-8">
    <meta name="viewport" content="width=device-width, initial-scale=1, shrink-to-fit=no">
    <meta name="description" content="">
    <meta name="author" content="">

    <title>Let's Explore Symfony 4</title>

    <!-- Bootstrap core CSS -->
    <link rel="stylesheet"
          href="https://maxcdn.bootstrapcdn.com/bootstrap/4.0.0-beta.3/css/bootstrap.min.css"
          integrity="sha384-Zug+QiDoJOrZ5t4lssLdxGhVrurbmBWopoEl+M6BdEfwnCJZtKxi1KgxUyJq13dy"
          crossorigin="anonymous">
</head>

<body>
    <header>
        <nav class="navbar navbar-expand-sm navbar-dark bg-dark">
            <div class="container">

                <a class="navbar-brand" href="#">Home</a>

                <div class="collapse navbar-collapse">
                    <ul class="navbar-nav mr-auto">
                        <li class="nav-item">
                            <a class="nav-link" href="/hello">Hello Page</a>
                        </li>
                    </ul>
                </div>
            </div>

        </nav>
    </header>

    <main role="main" class="container main">
        <div>
            <h1>Let's Explore Symfony 4</h1>
            <p class="lead">Lorem ipsum dolor sit amet, consectetur adipiscing elit. Cras rutrum sapien mauris, venenatis
                facilisis neque tincidunt vel. Maecenas vel felis vel turpis scelerisque eleifend. Fusce nec purus egestas,
                efficitur nisi ac, ultrices nulla. Pellentesque eu mollis tortor, in mollis nisl. Maecenas rhoncus quam non
                lacinia mollis.</p>
        </div>
    </main>
</body>
</html>
Which should look something like this:
It would be nice to push the h1 down a few pixels. We could add that as a style element direct to the template, but a better way is to move styles out to a separate file.
We need our style file(s) to be publicly accessible, so that means they need to live in the public directory.
mkdir public/css
touch public/css/custom-styles.css
Remember, touch is just a nerdy way to create a new, empty file with the given name, from the CLI. Feel free to create the directory, and the file from your IDE.
Rather than style the h1 tag directly, I'm going to "go up" to the main element, and apply my style to the .main class:
.main {
    margin-top: 20px;
}
This won't just work. We need to tell our template about our stylesheet.
I'm going to add my custom stylesheet entry just above the closing head tag. This ensures the Bootstrap CSS is run first, then my custom styles are applied "on top".
<!doctype html>
<html lang="en">
<head>
    <meta charset="utf-8">
    <meta name="viewport" content="width=device-width, initial-scale=1, shrink-to-fit=no">
    <meta name="description" content="">
    <meta name="author" content="">

    <title>Let's Explore Symfony 4</title>

    <!-- Bootstrap core CSS -->
    <link rel="stylesheet" href="{{ asset('css/custom-style.css') }}" />
</head>
Notice that the stylesheet is not using a hardcoded path. Instead, we can use the asset helper function to let the Asset Component take care of figuring out where our resources are located, which is super useful when our template setups get more complicated.
By using the symfony/website-skeleton we do already have access to a more full-featured front end assets management library: Webpack Encore. We aren't using this just yet. You don't always need everything the framework provides, so don't feel you have to use all the shiny stuff. Just use the bits you need.
Try It Yourself
Symfony 4 best practices for front end asset management (think: JS and CSS, amongst others) is to use Webpack Encore.
Try using the documentation, switching from our current CSS approach to using Webpack Encore.
What other tools / software did you need to install?
Was it worth the extra effort?
Consider leaving a comment below sharing your opinions and experiences.
Better Links
In our navbar we have added a couple of links:
    <nav class="navbar navbar-expand-sm navbar-dark bg-dark">
        <div class="container">

            <a class="navbar-brand" href="/">Home</a>

            <div class="collapse navbar-collapse">
                <ul class="navbar-nav mr-auto">
                    <li class="nav-item">
                        <a class="nav-link" href="/hello">Hello Page</a>
                    </li>
                </ul>
            </div>
        </div>
    </nav>
We have Home, which uses the site root (/), and our hello page on /hello.
Remember earlier how we changed the route path from /welcome to /, but kept the route name as welcome?
Well, one of the nicer parts about Twig is that if we don't hardcode our links, but instead, use the link's name, then we can easily change our paths without worrying about breaking our site.
What this means in practice is that instead of using:
<a class="navbar-brand" href="/">Home</a>
We would be better with:
<a class="navbar-brand" href="{{ path('welcome') }}">Home</a>
Likewise, for the Hello Page, we'd be better switching from:
<a class="nav-link" href="/hello">Hello Page</a>
to:
<a class="nav-link" href="{{ path('hello_page') }}">Hello Page</a>
Meaning our revised navbar looks like this:
    <nav class="navbar navbar-expand-sm navbar-dark bg-dark">
        <div class="container">

            <a class="navbar-brand" href="{{ path('welcome') }}">Home</a>

            <div class="collapse navbar-collapse">
                <ul class="navbar-nav mr-auto">
                    <li class="nav-item">
                        <a class="nav-link" href="{{ path('hello_page') }}">Hello Page</a>
                    </li>
                </ul>
            </div>
        </div>
    </nav>
Both path and asset are just some of the many available functions inside your Twig templates. Some you will use more than others.
You can test out how useful this is right now by changing the path of your hello_page to something other than /hello. As soon as you do this, and refresh your browser, you will see the link updates automatically to use the new path. This will keep working as long as you don't change the route's name. If you do change the name, be sure to update any path function calls in your template(s).
About The Hello Page
One kinda glaring problem right now is if we browse to the site root (/) we have a nice Bootstrap 4 page with our navbar, a dash of styling, and we feel quite good about ourselves.
Then, we click the "Hello Page" link and boom, no styles, no navbar, and the only way out is to hit the back button.
Wouldn't it be nicer if our "Hello Page", and any subsequent pages we add, all re-used the same basic layout?
It sure would, Kent.
Let's explore how we can do just that, and more, in the very next video.