Ubuntu 20.04 Portrait Mode Monitor Problems

On Saturday dinner time I decided to bump my Ubuntu 19.04 release to Ubuntu 20.04. What could go wrong?!

Well, here I am on a completely fresh installation. So it turns out: quite a lot.

I knew I was ballsed when the upgrade process failed in the terminal. I did an apt-get update and it seemed to think I was already on 20.04. As soon as I rebooted, of course, the OS never came back up. Sad times.

Anyway, tons of other difficulties aside, the issues I hit upon when finally re-installed were not that new to me when it comes to Linux:

Monitor problems.

In particular, I had two.

Firstly, the mini-display port to display port cable just inexplicably died on me. This completely threw me as all of a sudden my main monitor – a Dell P2715Q – seemed to be working, but the screen was black. I knew something was amiss as when I turned on the screen, Ubuntu would make it my main display but of course, it was all dark so I couldn’t see the log in prompt, or stuff like that.

Long story short – after a full re-install – I realised the cable was at fault. Sad times, and more hours lost.

But that’s fixed now. All it took was a new display port to display port cable, which very fortunately, I had in the spare parts box.

Portrait Mode Problems

A new one on me for Ubuntu 20.04.

I have another 27″ Dell monitor, a U2713HMt, which isn’t 4k. And has therefore been relegated to my second monitor.

I’ve never had issues with this monitor. It is always detected as my primary during install, so I have to install with my head tilted 90 degrees… or just turn the monitor back round, but aside from that, it’s been really solid.

Incidentally, having a 27″ screen at 2560×1440 makes a really nice super big terminal window if you are a massive nerd like me, and spend a lot of time in such places.

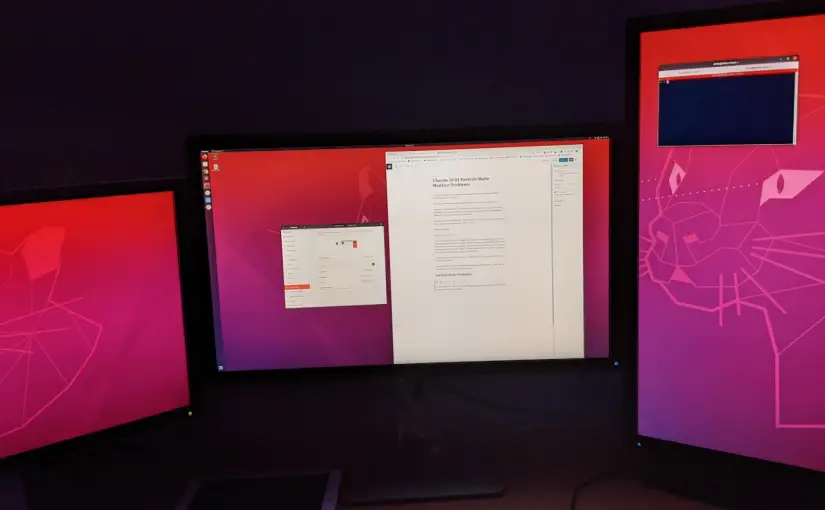
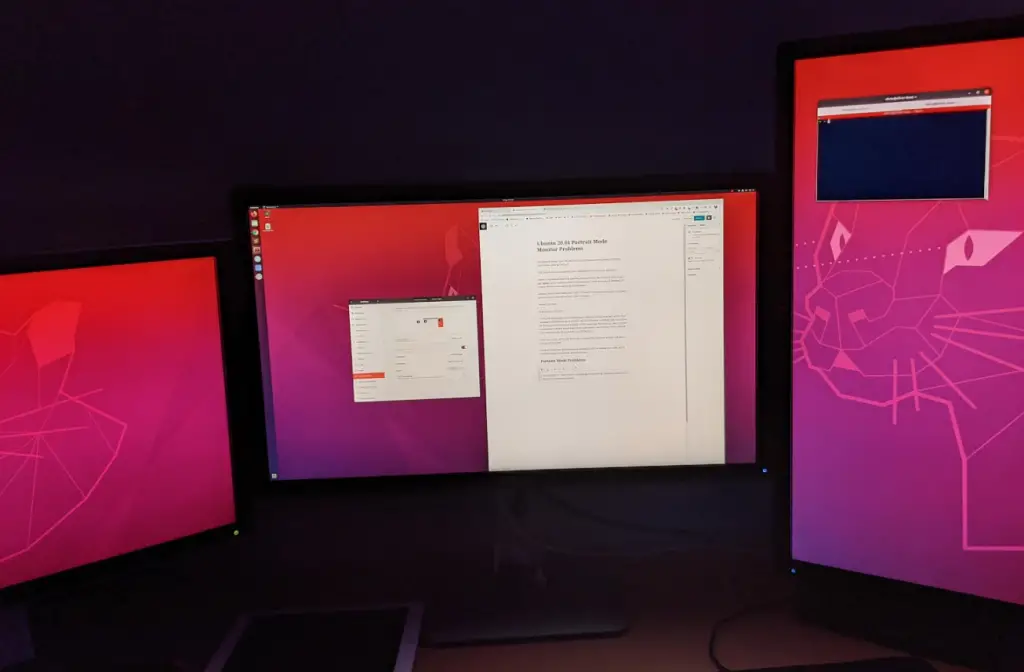
Anyway, Ubuntu 20.04 did not like putting this monitor into Portrait Right.

The issues I hit were that it would allow me to specify the setting, but when applied, it would either revert, or kill the monitor entirely.

Fixing Ubuntu 20.04 Portrait Mode Problems

Unfortunately I have not found a fix for the “Screen Display” menu. It won’t take the setting directly.

However, there is a workaround that seems to be working about 95% of the time for me.

sudo apt install arandr

Firstly, I installed arandr. This is a GUI for the more cryptic XRandR. If you’re a whizz with XRandR you can likely do the next bit from there directly somehow. And likely you don’t need blog posts like this to get your PC working properly. Fair play to you.

For the rest of us…

When installed, run arandr but run it as you, not sudo.

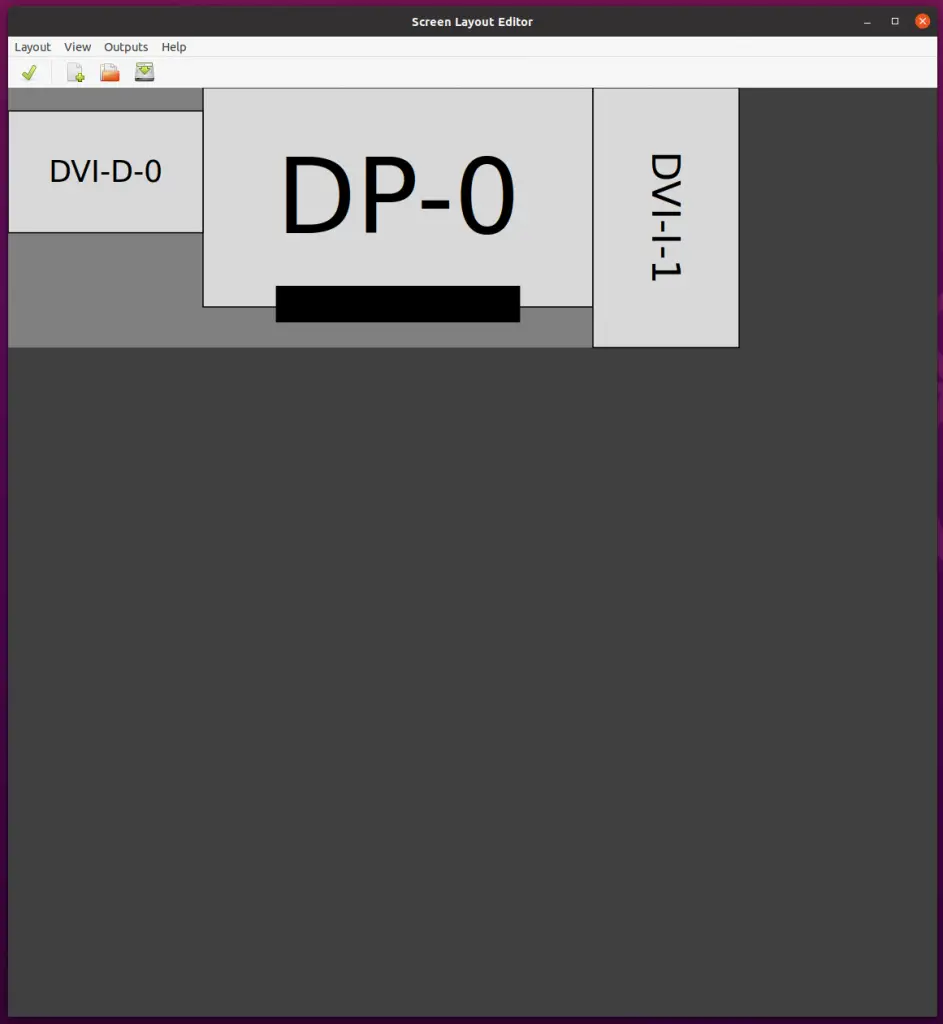
Make your monitor setup look how you want it. It’s intuitive enough. The cable names and types are labelled sufficiently that you should be able to figure out what is what.

The “Outputs” section is used to select the individual monitors and then modify them as needed. I just needed to make DVI-I-1 into Orientation “Left”.

Once done, choose “Save As…” and this give your file a name. I called mine triple.sh

triple.sh

Oh, the wit.

The reason we didn’t run this as sudo is because this file will, by default, be saved to your home directory, e.g. /home/chris/.screenlayout/triple.sh

You should be able to Apply this script now (from arandr) and your monitors should be correctly displaying.

However, this won’t last between reboots.

In order to persist between reboots, I used a “startup application” entry.

To get to this, hit the super key and type “Startup”, and then I entered the following:
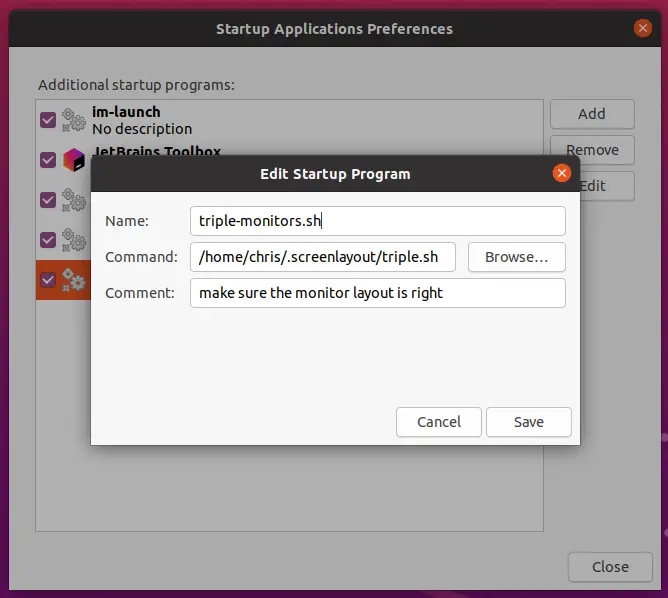
Giving me this:

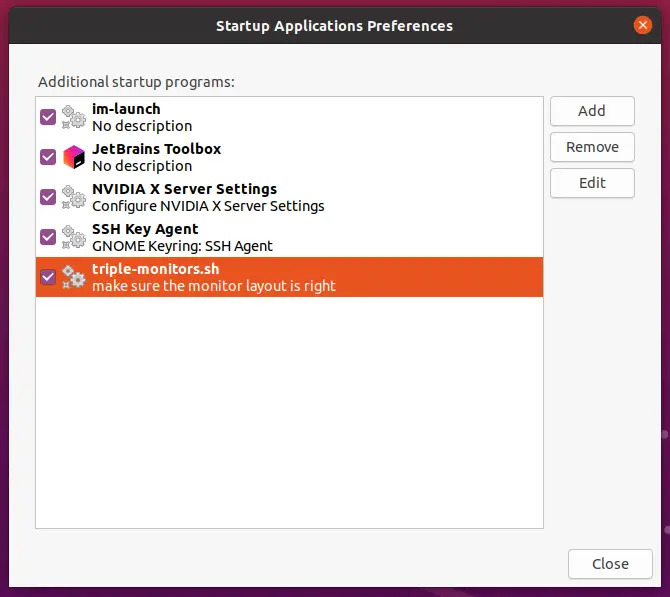
So far, it’s worked every time except once, when it didn’t. For which I have no reason.

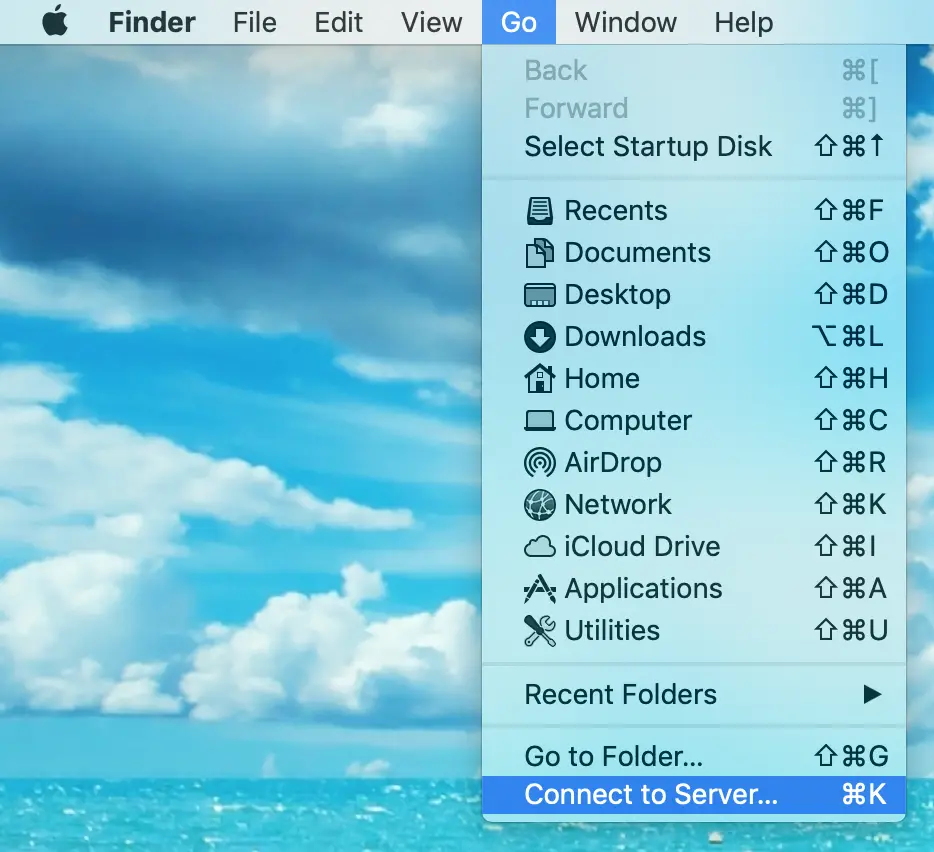
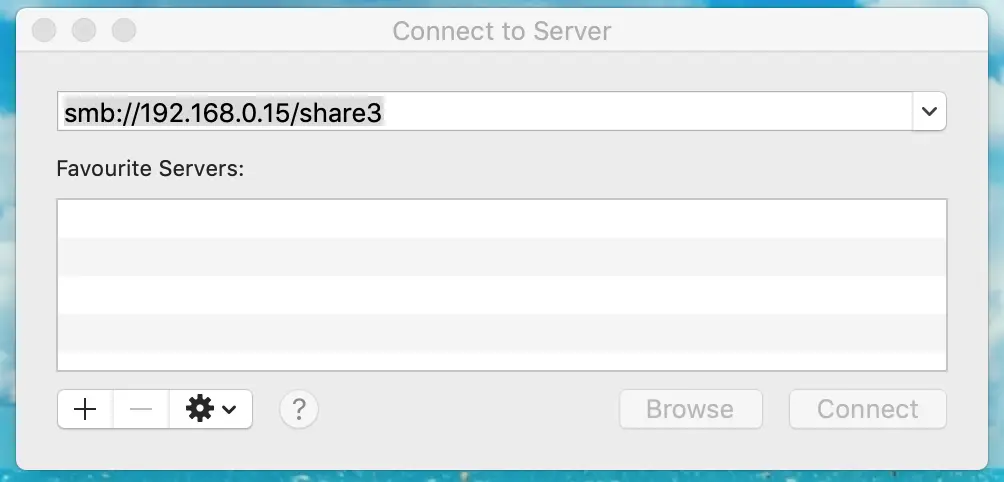
But hey, that’s Ubuntu baby. If you want an easy life, blow 3 grand on a Mac.

Edit: Less than 24 hours later, I have found that when resuming from sleep, I need to re-run the script. Not ideal. To make this as easy as possible, I moved the shell script to my desktop, and updated the start up script location above to point to the new location. Now, I just double click the file on my desktop whenever I resume and the monitors are out of whack.

How I share files between Mac and Ubuntu

For a while now I’ve wanted to share files between my OSX / Macbook Pro laptop, and one (or ideally several) of my Ubuntu Linux PCs.

Why?

Because my laptop has 256gb of hard disk space, and that is consumed at an alarmingly fast rate when recording, and rendering videos.

I’ve tried, and failed, to set up file sharing on Ubuntu on numerous occasions. It is, of course, due to something (or several compounding somethings) I have been doing wrong, but I neither have the patience, nor desire to figure out exactly what.

Enter Docker. Saviour of hair follicles. Provider of solutions.

File Sharing Ubuntu Style, With Docker

Let’s cut right to the chase. Here is some configuration:

# docker-compose.yml 

version: '3.4'

services:
  samba:
    image: dperson/samba
    networks:
      - default
    tmpfs:
      - /tmp
    restart: unless-stopped
    stdin_open: true
    tty: true
    ports:
      - 139:139
      - 445:445
    volumes:
      - "/path/to/my/local/folder:/mnt/share1:rw"
      - "/another/local/directory:/share2:rw"
      - "/home/chris/you/get/the/idea:/mnt/share3:rw"
    command: '-w workgroup -u "chris;chris" -s "share1;/mnt/share1;no;no;no;chris;chris" -s "share2;/mnt/share2;no;no;no;chris;chris" -s "share3;/mnt/share3;no;no;no;chris;chris"'

networks:
        default:

Essentially to make this work you need Docker, and Docker Compose installed on the PC (Ubuntu in my case) that you want to share data from.

There are some changes you will need to make.

Make sure each of the volumes match the path to a real directory on your computer.

The part before the colon is on your local PC.

The part after the colon is where that directory will be available inside the resulting running Docker container.

Customise the username and password appropriately.

You can find out what all the no;no;no bits mean in the documentation.

Then put the code from above into a file called docker-compose.yml somewhere on your computer. Once saved off to a file, run docker-compose up (or docker-compose up -d to run in the background) and away you go.

Your Ubuntu File Server For Mac

Once you have your shiny new Ubuntu Samba File Server up and running, how do you connect to it from your Mac? 

Pop in the IP address, or (perhaps more nicely) the name of your Ubuntu PC. 

The share name corresponds with whatever you called the share in the command section of your docker-compose.yml file.

Once you type in the full path to your share, click Connect.

After a second or two you should see a prompt. Enter the credentials to the share you created in your docker-compose.yml file.

Bonza. You are now connected. 

At this point you should have read / write access to the share. This is what I wanted, and allows me to copy all my video files over to the network drive, rather than store them on my over priced, under provisioned hard disk. 

Installing Wine 1.9.11 on Ubuntu 16.04

wine-software-that-can-lead-a-man-to-drinkIt should not have been this difficult.

But alas, it has been.

I must have spent 4 or more hours now trying to install Wine 1.9 (though any version would have been just fine after the first few hours), on Ubuntu 16.04 / Xenial.

The reason for all this Wine-ing? SQLYog. It’s by far and away the best MySQL GUI I have ever used, and nothing on Linux comes close. Wine allows me to run Windows software (almost) as though it were a native Linux app. Pretty awesome.

Now, I’ve never had any trouble installing Wine before. I’m almost positive (though it’s always worth doubting my own memory) that I’ve had Wine installed on previous Linux / Ubuntu boxes simply by using the Ubuntu Software Center. Sure, it’s an ancient version, but it does the job.

Things got so desperate that I was in the middle of installing Windows 7 into a VirtualBox VM just so I could run this one single app. And of course, whilst that was installing in the background, I managed to stumble upon a fix.

Anyway, enough background / blather, I’m sure you are only interested in how I fixed this problem.

My Solution

I followed the instruction guide from the Wine docs:

sudo dpkg --add-architecture i386 
sudo add-apt-repository ppa:wine/wine-builds
sudo apt-get update
sudo apt-get install --install-recommends winehq-devel

However this constantly threw up errors like:

Reading package lists... Done
Building dependency tree       
Reading state information... Done
Some packages could not be installed. This may mean that you have
requested an impossible situation or if you are using the unstable
distribution that some required packages have not yet been created
or been moved out of Incoming.
The following information may help to resolve the situation:

The following packages have unmet dependencies.
 winehq-devel : Depends: wine-devel (= 1.9.11~ubuntu16.04.1)

I knew there was something around the whole x64 / i386 thing going on, and along the way I learned that adding in :i386 after a package name installs the 32 bit version of the software, should you be on a 64 bit OS.

This led me to trying all manner of variations.

Then I stumbled upon this, which gave a much clearer indication of the missing dependency:

➜  ~ sudo apt-get install --install-recommends wine-devel-i386
Reading package lists... Done
Building dependency tree       
Reading state information... Done
Some packages could not be installed. This may mean that you have
requested an impossible situation or if you are using the unstable
distribution that some required packages have not yet been created
or been moved out of Incoming.
The following information may help to resolve the situation:

The following packages have unmet dependencies.
 wine-devel-i386:i386 : Depends: libgphoto2-6:i386 (>= 2.5.9) but it is not going to be installed
                        Recommends: libgnutls-deb0-28:i386 but it is not installable or
                                    libgnutls26:i386 but it is not installable
                        Recommends: libsane:i386 but it is not going to be installed
E: Unable to correct problems, you have held broken packages.

That led me to this StackOverflow thread which got me much further, but not 100% of the way there.

The first command worked a treat:

sudo apt-get install gcc-multilib libasound2-dev:i386 libgsm1-dev:i386 libjpeg8-dev:i386 liblcms2-dev:i386 libldap2-dev:i386 libmpg123-dev:i386 libopenal-dev:i386 libv4l-dev:i386 libx11-dev:i386 libxinerama-dev:i386 libxml2-dev:i386 zlib1g-dev:i386

But the second one needed a little modification:

sudo apt-get install libcapi20-dev:i386 libcups2:i386 libdbus-1-3:i386 libfontconfig:i386 libfreetype6:i386 libglu1-mesa:i386 libgphoto2-6:i386 libncurses5:i386 libosmesa6:i386 libsane:i386 libxcomposite1:i386 libxcursor1:i386 libxi6:i386 libxrandr2:i386 libxslt1.1:i386 ocl-icd-libopencl1:i386 libgd3:i386

Fortunately, again, the output was very helpful in pointing me towards the right dependency.

With both of those installing all the bits and pieces, finally Wine installed properly:

sudo apt-get install --install-recommends winehq-devel wine-devel

Most of the frustration came from me not understanding the output clearly enough to figure out what dependency I was missing.

Some raw output which may help you debug this problem:

sudo dpkg --add-architecture i386 
sudo add-apt-repository ppa:wine/wine-builds
sudo apt-get update
sudo apt-get install --install-recommends winehq-devel
apt-mark showhold 
sudo apt-get remove wine
sudo apt-get install wine1.7
sudo apt-get install wine1.7-amd64 wine1.7-i386
sudo apt-get install --install-recommends wine-devel
sudo apt-get install --install-recommends wine-devel-i386
sudo apt-get install --install-recommends wine-devel-i386:i386
sudo apt-get install ia32-libs
sudo apt-get install wine-devel-i386
sudo apt-get install --install-recommends winehq-devel wine-devel
sudo apt-get install --install-recommends winehq-devel libasound2-plugins:i386
sudo apt-get install libcapi20-dev:i386 libcups2:i386 libdbus-1-3:i386 libfontconfig:i386 libfreetype6:i386 libglu1-mesa:i386 libgnutls26:i386 libgphoto2-2:i386 libncurses5:i386 libosmesa6:i386 libsane:i386 libxcomposite1:i386 libxcursor1:i386 libxi6:i386 libxrandr2:i386 libxslt1.1:i386 ocl-icd-libopencl1:i386
sudo apt-get install gcc-multilib libasound2-dev:i386 libgsm1-dev:i386 libjpeg8-dev:i386 liblcms2-dev:i386 libldap2-dev:i386 libmpg123-dev:i386 libopenal-dev:i386 libv4l-dev:i386 libx11-dev:i386 libxinerama-dev:i386 libxml2-dev:i386 zlib1g-dev:i386 
apt-get install libcapi20-dev:i386 libcups2:i386 libdbus-1-3:i386 libfontconfig:i386 libfreetype6:i386 libglu1-mesa:i386 libgnutls26:i386 libgphoto2-2:i386 libncurses5:i386 libosmesa6:i386 libsane:i386 libxcomposite1:i386 libxcursor1:i386 libxi6:i386 libxrandr2:i386 libxslt1.1:i386 ocl-icd-libopencl1:i386
sudo apt-get install libcapi20-dev:i386 libcups2:i386 libdbus-1-3:i386 libfontconfig:i386 libfreetype6:i386 libglu1-mesa:i386 libgnutls26:i386 libgphoto2-2:i386 libncurses5:i386 libosmesa6:i386 libsane:i386 libxcomposite1:i386 libxcursor1:i386 libxi6:i386 libxrandr2:i386 libxslt1.1:i386 ocl-icd-libopencl1:i386
sudo apt-get install --install-recommends winehq-devel wine-devel
sudo apt-get install libcapi20-dev:i386 libcups2:i386 libdbus-1-3:i386 libfontconfig:i386 libfreetype6:i386 libglu1-mesa:i386 libgphoto2-2:i386 libncurses5:i386 libosmesa6:i386 libsane:i386 libxcomposite1:i386 libxcursor1:i386 libxi6:i386 libxrandr2:i386 libxslt1.1:i386 ocl-icd-libopencl1:i386
sudo apt-get install libcapi20-dev:i386 libcups2:i386 libdbus-1-3:i386 libfontconfig:i386 libfreetype6:i386 libglu1-mesa:i386  libncurses5:i386 libosmesa6:i386 libsane:i386 libxcomposite1:i386 libxcursor1:i386 libxi6:i386 libxrandr2:i386 libxslt1.1:i386 ocl-icd-libopencl1:i386
sudo apt-get install libcapi20-dev:i386 libcups2:i386 libdbus-1-3:i386 libfontconfig:i386 libfreetype6:i386 libglu1-mesa:i386 libgphoto2-6:i386 libncurses5:i386 libosmesa6:i386 libsane:i386 libxcomposite1:i386 libxcursor1:i386 libxi6:i386 libxrandr2:i386 libxslt1.1:i386 ocl-icd-libopencl1:i386
sudo apt-get install libcapi20-dev:i386 libcups2:i386 libdbus-1-3:i386 libfontconfig:i386 libfreetype6:i386 libglu1-mesa:i386 libgphoto2-6:i386 libncurses5:i386 libosmesa6:i386 libsane:i386 libxcomposite1:i386 libxcursor1:i386 libxi6:i386 libxrandr2:i386 libxslt1.1:i386 ocl-icd-libopencl1:i386 libgd3:1386
sudo apt-get install libcapi20-dev:i386 libcups2:i386 libdbus-1-3:i386 libfontconfig:i386 libfreetype6:i386 libglu1-mesa:i386 libgphoto2-6:i386 libncurses5:i386 libosmesa6:i386 libsane:i386 libxcomposite1:i386 libxcursor1:i386 libxi6:i386 libxrandr2:i386 libxslt1.1:i386 ocl-icd-libopencl1:i386 libgd3:i386
sudo apt-get install --install-recommends winehq-devel wine-devel

wine is not an emulator

But it may make you need a drink.

node-gyp rebuild Error on Ubuntu 15.04 with Node 4.x.x

I’m going to start with the tl;dr version:

if you are experiencing this issue, and you have recently installed Node 4.x.x, then this is likely your issue.

Solutions?

Find another package, or use an older version of node for now if you absolutely must use that package.

The Longer Version

I had been trying to install “webkid-react-starterkit@0.3.1” on my Ubuntu dev box for ages last night, and spent a wasted 25 minutes again on it tonight.

The error was staring at me right in the face honestly:

gyp ERR! build error 
gyp ERR! stack Error: `make` failed with exit code: 2
gyp ERR! stack     at ChildProcess.onExit (/usr/lib/node_modules/npm/node_modules/node-gyp/lib/build.js:270:23)
gyp ERR! stack     at emitTwo (events.js:87:13)
gyp ERR! stack     at ChildProcess.emit (events.js:172:7)
gyp ERR! stack     at Process.ChildProcess._handle.onexit (internal/child_process.js:200:12)
gyp ERR! System Linux 3.19.0-30-generic
gyp ERR! command "/usr/bin/nodejs" "/usr/lib/node_modules/npm/node_modules/node-gyp/bin/node-gyp.js" "rebuild"
gyp ERR! cwd /home/chris/Development/php/dunglas-api-test/react-example/node_modules/jest-cli/node_modules/jsdom/node_modules/contextify
gyp ERR! node -v v4.2.1
gyp ERR! node-gyp -v v3.0.3
gyp ERR! not ok 
npm ERR! Linux 3.19.0-30-generic
npm ERR! argv "/usr/bin/nodejs" "/usr/bin/npm" "install"
npm ERR! node v4.2.1
npm ERR! npm  v2.14.7
npm ERR! code ELIFECYCLE

npm ERR! contextify@0.1.14 install: `node-gyp rebuild`
npm ERR! Exit status 1
npm ERR! 
npm ERR! Failed at the contextify@0.1.14 install script 'node-gyp rebuild'.
npm ERR! This is most likely a problem with the contextify package,
npm ERR! not with npm itself.
npm ERR! Tell the author that this fails on your system:
npm ERR!     node-gyp rebuild
npm ERR! You can get their info via:
npm ERR!     npm owner ls contextify
npm ERR! There is likely additional logging output above.

npm ERR! Please include the following file with any support request:
npm ERR!     /home/chris/Development/php/dunglas-api-test/react-example/npm-debug.log

It’s likely not as easy to see here, but on my terminal output, it’s colour coded and it’s rather glaringly obvious:

npm ERR! Failed at the contextify@0.1.14 install script 'node-gyp rebuild'.

I went round many houses.

From trying to install contextify globally, to completely reinstalling node, to even getting down to specifying the exact version of the v8 profile I wanted (npm install v8-profiler@3.6.2-1 ).

Nothing worked.

Anyway, it turns out it’s incompatible with this version of node all along.

NodeJS 4.0.0 only tagged as stable on 8th September 2015, and here I am running 4.2.1.

Buckle in, it’s going to be a wild ride.