Man alive. I hate stuff like this. Virtualbox is a great piece of software, but it does some whacky things.
Recently I migrated my infrastructure from Virtual Machines to Docker.
I replaced a Digital Ocean VPS with a local Virtualbox VM for running my private GitLab. The primary reason for this is that Docker images take up a chunk of space, and a low tier DO droplet just doesn’t cut it in terms of disk space.
I had a spare 120gb SSD laying around so figured: hey, why not use that and 4x my usable disk space for GitLab? Sounds like a good idea, right?
Actually, it took a lot of effort. But in the end, it worked. I decided to use thin provisioning and make the virtual box image think it had a 2tb disk, when in reality it was sharing the same SSD with another Virtualbox machine that runs my GitLab CI multi-runner instance.
Ok, so the whys-and-wherefores of that set up are for a forthcoming / different post.
What I didn’t expect is for my disk to fill up in less than 2 weeks. I mean, I knew my Docker images took up a chunk of space, but I had purposefully mounted a totally different disk for GitLab backups, and disabled container backups along the way. How could it be that within 2 weeks I had 98% disk utilisation?
Well, it turns out: snapshots.
Or more specifically, one single 90.1gb snapshot:
du -h
84G	./rancher-node-2/Snapshots
88G	./rancher-node-2
What I had done is taken a “base snapshot” just after creating the VM, and then promptly forgotten about said snapshot entirely.
2 weeks later, I log on today and try to hit my GitLab, but got a 503 error:
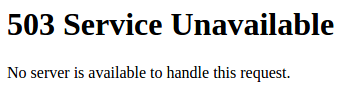
Fun times.
A bit of digging showed me that both my “rancher-node-2” VM, and the GitLab CI Multi-Runner VM were in a paused state.
A little further digging showed I had 2gb of disk space left. And that’s where I found out about the snapshot.
Ok, so simple solution – delete the snapshot.
Yeah, if only:
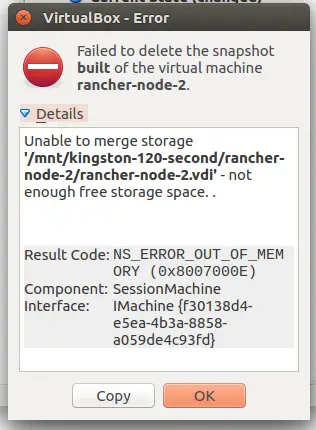
So, that’s not enough free disk space to delete a file then? Heh, not quite. Apparently deleting a snapshot also involves merging snapshots, or some such – I didn’t dive into the technicals.
But still, seems daft.
Anyway, the advice I found out there on the ‘net was to have at least as much disk space again in order to do the delete. In other words, if you have a 10gb VM, and a 20gb snapshot, in order to delete the snapshot you’d need a 60gb disk. But of course!
Sadly, I don’t have another spare 240gb disk laying around. I don’t use large disks anymore as I’ve lost two 2tb disks (old spinny stuff, but still) in recent years and the data loss is mildly irritating to put it politely. I stick to smaller disks so if data loss does occur, it isn’t as bad. In theory.
Fortunately, I did have a spare 100gb or so on a different partition. But on the face of it, that doesn’t seem that useful, right?
My Solution
This may seem a little unorthodox but here goes.
To begin with, I tried to simply clone the existing VM. Doing a full clone gives the option to disregard any snapshots.
I moved my second VM off the 120gb disk freeing up about 18gb or so.
I tried to clone, it took a very long time, and then it promptly failed:
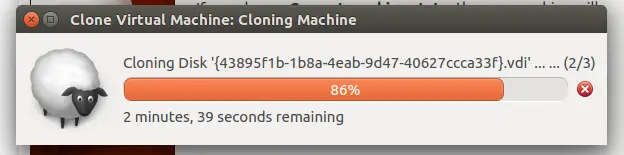
Don’t be fooled by that timer, it took a lot longer than that.
Anyway, that didn’t work, so I came up with a more geeky plan.
I moved the snapshot file from my 120gb disk. This freed up a huge amount of space:
df -h
Filesystem      Size  Used Avail Use% Mounted on
/dev/sdb1       110G  3.4G  101G   4% /mnt/kingston-120-second
Then, I symlinked the snapshot back into place:
➜  Snapshots ln -s "/media/chris/Data/Virtual Machines/{43895f1b-1b8a-4eab-9d47-40627ccca33f}.vdi" ./{43895f1b-1b8a-4eab-9d47-40627ccca33f}.vdi
➜  Snapshots ls -la
total 12
drwx------ 2 chris chris 4096 Apr 30 20:37 .
drwxrwxr-x 4 chris chris 4096 Apr 30 20:10 ..
lrwxrwxrwx 1 chris chris   77 Apr 30 20:37 {43895f1b-1b8a-4eab-9d47-40627ccca33f}.vdi -> /media/chris/Data/Virtual Machines/{43895f1b-1b8a-4eab-9d47-40627ccca33f}.vdi
Symlinks seem scary. Here’s how I remember the syntax:
It’s just like the copy command.
ln {path to source} {path to become my symlink}

# just like 'cp'

cp {path to copy from} {path to new file}
I tried to clone the VM at this point, but this again failed with an out of disk space error.
Instead, I then tried to delete the snapshot.

This consumed nearly all the disk space, but finally worked. Hoorah, right? Not quite.
There was still a downside. My .vdi file was now at 97.3gb. I could boot the VM and see that inside the VM I was only using 46gb. Hmm.
What I had to do was to somehow shrink the disk back down to as close to 46gb as I could. This was a little involved, and took a while.
I did the following:
chris@rancher-node-2:~$ sudo dd if=/dev/zero | pv | sudo dd of=/bigemptyfile bs=4096k

dd: error writing '/bigemptyfile': No space left on device                                                         ]
2017+63027194 records in
2017+63027193 records out
2103230164992 bytes (2.1 TB, 1.9 TiB) copied, 5693.08 s, 369 MB/s
1.91TiB 1:34:53 [ 352MiB/s] [           <=>                                                                        ]

chris@rancher-node-2:~$ Connection to 192.168.0.37 closed by remote host.
Connection to 192.168.0.37 closed.
I can’t say this is my own solution – I found it on StackOverflow 🙂
As you can see, this command ran until it failed. It never consumed any disk space on my physical hard disk – which is nice, as as I say, I thin provisioned this disk so that wouldn’t have worked out so well.
Still, once this process failed, I wasn’t done.
I then ran:
vboxmanage modifyhd rancher-node-2/rancher-node-2.vdi --compact
0%...10%...20%...30%...40%...50%...60%...70%...80%...90%...100%
This took about 10 minutes, but after finishing I was down to a 56gb .vdi file. Good enough.
Finally, remember to delete the bigemptyfile :
rm /bigemptyfile