How I Fixed: “error authorizing context: authorization token required”

I love me some Dockerised GitLab. I have the full CI thing going on, with a private registry for all my Docker images that are created during the CI process.

It all works real nice.

Until that Saturday night, when suddenly, it doesn’t.

Though it sounds like I’m going off on a tangent, it’s important to this story that you know I recently I changed my home broadband ISP.

I host one of my GitLab instances at my house. All my GitLab instances are now Dockerised, managed by Rancher.

I knew that as part of switching ISPs, there might (read: 100% would) be “fun” with firewalls, and ports, and all that jazz.

I thought I’d got everything sorted, and largely, I had.

Except I decided that whilst all this commotion was taking place, I would slightly rejig my infrastructure.

I use LetsEncrypt for SSL. I use the LetsEncrypt certs for this particular GitLab’s private registry.

I had the LetsEncrypt container on one node, and I was accessing the certs via a file share. It seemed pointless, and added complexity (the afore mentioned extra firewall rules), which I could remove if I moved the container on to the same box as the GitLab instance.

I made this move.

Things worked, and I felt good.

Then, a week or so later, I made some code changes and pushed.

The build failed almost immediately. Not what I needed on a Saturday night.

In the build logs I could see this:

Error response from daemon: Get https://my.gitlab:5000/v2/: received unexpected HTTP status: 500 Internal Server Error

This happened when the CI process was trying to log in to the private registry.

After a bit of head scratching, I tried from my local machine and sure enough I got the same message.

My Solution

As so many of my problems seem to, it boiled down to permissions.

Rather than copy the certs over from the original node, I let LetsEncrypt generate some new ones. Why not, right?

This process worked.

The GitLab and the Registry containers used a bind mounted volume to access the LetsEncrypt cert inside the container on the path /certs/.

When opening each container, I would be logged in as root.

Root being root, I had full permissions. I checked each file with a cheeky cat and visually confirmed that all looked good.

GitLab doesn’t run as root, however, and as the files were owned by root, and had 600 permissions:

Completed 500 Internal Server Error in 125ms (ActiveRecord: 7.2ms)
Errno::EACCES (Permission denied @ rb_sysopen - /certs/privkey.pem):
lib/json_web_token/rsa_token.rb:20:in `read'
lib/json_web_token/rsa_token.rb:20:in `key_data'
lib/json_web_token/rsa_token.rb:24:in `key'
lib/json_web_token/rsa_token.rb:28:in `public_key'
lib/json_web_token/rsa_token.rb:33:in `kid'
lib/json_web_token/rsa_token.rb:12:in `encoded'

The user GitLab is running as doesn’t have permission to read the private key.

Some more error output that may help future Googlers:

21/01/2018 21:31:51 time="2018-01-21T21:31:51.048129504Z" level=warning msg="error authorizing context: authorization token required" go.version=go1.7.6 http.request.host="my.gitlab:5000" http.request.id=4d91b482-1c43-465d-9a6e-fab6b823a76c http.request.method=GET http.request.remoteaddr="10.42.18.141:36654" http.request.uri="/v2/" http.request.useragent="docker/17.12.0-ce go/go1.9.2 git-commit/d97c6d6 kernel/4.4.0-109-generic os/linux arch/amd64 UpstreamClient(Docker-Client/17.12.0-ce (linux))" instance.id=24bb0a87-92ce-47fc-b0ca-b9717eabf171 service=registry version=v2.6.2
21/01/2018 21:31:5110.42.16.142 - - [21/Jan/2018:21:31:51 +0000] "GET /v2/ HTTP/1.1" 401 87 "" "docker/17.12.0-ce go/go1.9.2 git-commit/d97c6d6 kernel/4.4.0-109-generic os/linux arch/amd64 UpstreamClient(Docker-Client/17.12.0-ce (linux))"

Argh.

Thankfully I hadn’t deleted the old cert, so I went back and saw that I had previously set 0640  on the private key in the old setup.

Directory permissions for the certs was set to 0750 with execute being required as well as read.

In my case this was sufficient to satisfy GitLab.

When making the change on the new node, I could then immediately log back in.

A Tip To Spot This Sooner

I would strongly recommend that you schedule your project to run a build every ~24 hours, even if nothing has changed.

This will catch weird quirks that aren’t related to your project, but have inadvertently broken your project’s build.

It’s much easier to diagnose problems whilst they are fresh in your mind.

Also, ya’ know, better documentation! This is exactly why I’m now writing this post. So in the future when I inevitable make a similar mistake, I now know where to look first 🙂
Symfony with Redis

In a bid to make getting up and running with CodeReviewVideos tutorials moving forwards, I have created a new repo called the Docker and Symfony3 starting point.

I will be using this as the basis for all projects going forwards as it dramatically simplifies the process of setting up each tutorial series, and should – in theory – make reliably reproducing my setups much easier for you.

I’ve had a lot of feedback lately to say it’s increasingly hard work to follow some of the older tutorials as the dependencies are out of date.

Taking this feedback on board, I will do my best to update these projects in the next few weeks-to-months. I am, however, going to wait for Symfony 4 to land before I spend any time updating stuff. No point duplicating a bunch of effort. Symfony 4 drops in November, in case you are wondering.

Video Update

This week saw two new videos added to the site. Unfortunately I was ill early in the week so didn’t get to record the usual third video.

#1 – [Part 1/2] – Symfony 3 with Redis Cache

Caching is a (seemingly) easy win.

Imagine we have some expensive operation: maybe a heavy computation, or some API request that needs to go across the slow, and unpredictable internet.

Wouldn’t it be great if we did this expensive operation only once, saved (or cached) the result, and then for every subsequent request, we sent back the locally saved result.

Yes, that sounds awesome.

Symfony has us covered here. The framework comes with a bunch of ways we can cache and store data.

Redis seems to be the one I find most larger organisations like to use, so that’s one of the reasons behind picking Redis out of the bunch.

At this point you may be thinking:

But Chris, I don’t have a Redis instance just laying around waiting for use, and I’m not rightly sure how I might go about setting one up!

Well, not to worry.

To make life as simple as possible, we are going to use Docker.

Docker… simple… the same sentence?!

Well, the jolly good news is that you don’t need to know anything about Docker to use this setup. At least, I hope you won’t. That’s the theory.

As mentioned above, I am making use of the new Docker / Symfony 3 starting point repo. I’ve tweaked this a touch for our Redis requirements.

By the end of this video you will have got a Symfony website up and running, and cached data into Redis. We will cover the setup required, both from a Docker perspective, and the config needed inside Symfony.

#2 – [Part 2/2] – Symfony 3 with Redis Cache

In the previous video we put all our caching logic into a controller action.

That’s really not going to cut it beyond your first steps. In reality you’re going to want to move this stuff out into a separate service.

To give you an example of how I might do it:

Controller calls CacheApiWrapper which calls Api if needed.

That might not be making much sense, so let’s break it down further.

Let’s imagine an app without caching.

We need to call a remote API to get the days prices of Widgets.

We hit a controller action which delegates the API call off to our Api service, which really manages the API call for us. When the API call completes (or fails), it returns some response to the calling controller action, which in turn returns the response to the end user.

If that API call always returns the same response every time it is called – maybe the prices of Widgets only change every 24 hours – then calling the remote API for every request is both pointless, and wasteful.

We could, if we wanted to, add the Caching functionality directly into the Api service.

I don’t like this approach.

Instead, I prefer to split the responsibility of Caching out into a separate ‘layer’. This layer / caching service has an identical API to the Api service. This caching service takes the Api service as a constructor argument, and wraps the calls, adding caching along the way.

If all this sounds complex, after seeing some code, hopefully it will make a bit more sense:

class WidgetController extends Controller
{
    /**
     * @Route("/widgets", name="widget_prices")
     */
    public function widgetPriceAction(
        WidgetPriceProvider $widgetPriceProvider
    )
    {
        return $this->render(
            ':widget:widget_price.html.twig',
            [
                'widget_prices' => $widgetPriceProvider->fetchWidgetPrices(),
            ]
        );
    }

This should hopefully look familiar.

The unusual part is the WidgetPriceProvider. Well, they do say the two hardest parts of computer science are cache invalidation, and naming things…

Really WidgetPriceProvider is the best name I could think of to explain what’s happening. This service provides Widget Prices.

How it provides them is where the interesting part happens:

<?php

namespace AppBundle\Provider;

use AppBundle\Connectivity\Api\WidgetPrice;
use AppBundle\Widget\WidgetPriceInterface;
use Psr\Cache\CacheItemPoolInterface;
use Symfony\Component\Cache\Adapter\AdapterInterface;

class WidgetPriceProvider implements WidgetPriceInterface
{
    /**
     * @var CacheItemPoolInterface
     */
    private $cache;

    /**
     * @var WidgetPrice
     */
    private $widgetPriceApi;

    public function __construct(
        AdapterInterface $cache, 
        WidgetPrice $widgetPriceApi
    )
    {
        $this->cache          = $cache;
        $this->widgetPriceApi = $widgetPriceApi;
    }

    public function fetchWidgetPrices()
    {
        $cacheKey = md5('fetch_widget_prices');

        $cachedWidgetPrices = $this->cache->getItem($cacheKey);

        if (false === $cachedWidgetPrices->isHit()) {

            $widgetPrices = $this->widgetPriceApi->fetchWidgetPrices();

            $cachedWidgetPrices->set($widgetPrices);
            $this->cache->save($cachedWidgetPrices);

        } else {

            $widgetPrices = $cachedWidgetPrices->get();

        }

        return $widgetPrices;
    }
}

As mentioned, WidgetPriceProvider is a wrapper / layer over the Api Service.

It also has the cache injected.

This way the API call is separated from the cache, and can be used directly if needed. Sometimes I don’t want to go via the cache. Maybe in the admin backend, for example.

Note that this service implements WidgetPriceInterface. This isn’t strictly necessary. This interface defines a public function of fetchWidgetPrices.

The reason for this is, as mentioned earlier, I want the caching layer (WidgetPriceProvider) to use the same method name(s) as the underlying API service.

Speaking of which:

<?php

namespace AppBundle\Connectivity\Api;

use AppBundle\Widget\WidgetPriceInterface;
use GuzzleHttp\Client;
use Psr\Log\LoggerInterface;

class WidgetPrice implements WidgetPriceInterface
{
    /**
     * @var LoggerInterface
     */
    private $logger;
    /**
     * @var Client
     */
    private $client;

    /**
     * WidgetPrice constructor.
     *
     * @param LoggerInterface $logger
     * @param Client          $client
     */
    public function __construct(
        LoggerInterface $logger,
        Client $client
    )
    {
        $this->client = $client;
        $this->logger = $logger;
    }

    public function fetchWidgetPrices()
    {
        // better to inject via constructor, but easier to show like this
        $url = "https://api.widgetprovider.com/prices.json";

        try {

            return json_decode(
                $this->client->get($url)->getBody()->getContents(),
                true
            );

        } catch (\Exception $e) {

            $this->logger->alert('It all went Pete Tong', [
                'url'       => $url,
                'exception' => [
                    'message' => $e->getMessage(),
                    'code'    => $e->getCode()
                ],
            ]);

            return [];
        }
    }
}

So really it’s about delegating responsibility down to a more appropriate layer.

Be Careful – don’t blindly copy this approach.

There is a gotcha in this approach which maybe not be immediately obvious.

If your API call fails, the bad result (and empty array in this case) will still be cached.

Adapt accordingly to your own needs. It may be better to move the try  / catch logic out from the WidgetPrice class and into the WidgetPriceProvider instead.

Or something else. It’s your call.

Anyway, that’s an excursion into a potentially more real world setup.

Hopefully you find this weeks videos useful.

As every, have a great weekend and happy coding.

Chris

Docker Tutorial For Beginners (Update)

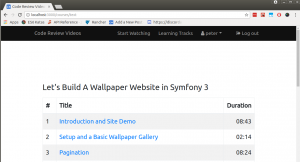
I’ve been super busy this week behind the scenes working on the new site version. Typically, every time I think I’m done (we all know we are never done :)), I hit upon something I’ve either missed, or overlooked.

There are a bunch of CSS related jobs:

Yeah… if you could just fix that margin-top, that’d be great

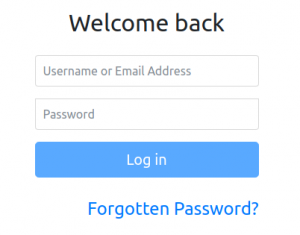
And React seems to have completely broken my mailing list sign up forms:

You can’t tell from a static image, but these inputs don’t allow input 🙂

And some things I only noticed when testing my user journeys:

What, no remember me?

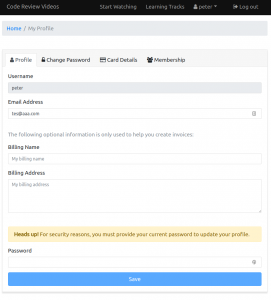
One thing I am really happy with is the new Profile panel:

4 tabs, a lot of work 🙂

There are 29 open tickets left before I consider this next version done (again, never really done :)).

I reckon I will be happy enough to open the beta when I’m down to 20 tickets. I genuinely wish I was a 10x developer, able to blitz stuff like this out in a weekend.

I’m really looking forward to switching over though. This new site is so much nicer to work with from a development point of view. And I have a bunch of improvements from a member / visitor point of view, too 🙂

Both the front end and back end are completely separated. Both are pushed through a GitLab CI pipeline, which automates the test runs, and if all goes to plan, builds a Docker image for both. I can then deploy these using Rancher.

It’s a great setup.

As you may have noticed, Docker is currently the main course topic on the site. This is a Docker tutorial for beginners. If you’ve ever wanted to learn Docker, and prefer to see real world setups rather than simplified examples then this is the right starting point for you.

Which brings me neatly on to this weeks…

Video Update

This week saw three new videos added to the site.

All of this week’s videos fall under the same theme:

Long, and short term storage of data in Docker.

One of the most confusing aspects of switching my stack from Virtual Machines to Docker was what was happening to my data?

In Virtual Machine-land (if such a place ever existed) the location of my data was fairly obvious. It would either be on the VM itself (on the virtual hard disk), or on some attached network drive.

Things are roughly the same in Docker, but it’s not a 100% like-for-like experience. Especially not on a Mac.

#1. Docker, Without Volumes

Are volumes essential for persistent storage in Docker?

It can sometimes seem that way. A lot of Docker tutorials I followed seemed to equate persisting data with Docker Volumes.

In this video we explore persisting data within Docker containers without Volumes.

Yes, it can be done.

Yes, it works just fine.

And yes, you will lose your data if you delete the container your data belongs too 🙂

So don’t fall in to that trap. Watch this video and learn how to avoid this mistake.

#2. [Part 1] – Docker Volumes – Bind Mounts

I’m going out on a limb here, and I’m going to guess you love a good Star Trek episode as much as me.

Nothing troubles my tribbles quite like a blurt of technobabble:

The temporal surge we detected was caused by an explosion of a microscopic singularity passing through this solar system. Somehow, the energy emitted by the singularity shifted the chroniton particles in our hull into a high state of temporal polarisation.

Now the good news, when watching Star Trek, is that you really don’t need to understand any of that to gain enjoyment from the episode. The writers make sure the characters appear to understand it, and the Federation once again, save the day.

But what about technobabble we do have to understand?

Docker Bind Mounts.

Well, in this video we run our tricorder over bind mounts and figure out just what the heck these things are.

The good news?

Beyond the name they are surprisingly straightforward.

Set tachyon cannons to maximum dispersion!

#3. [Part 2] – Docker Volumes – Volumes

Here’s the unusual thing:

Docker bind mounts sounds complicated, but as we saw in the previous video, they really aren’t.

Docker volumes, on the other hand, sound quite straightforward.

But they are more complicated.

Docker’s Volumes are the future of the way we work with data in Docker.

Therefore, understanding Volumes is a very useful skill to have.

Fortunately, even though Volumes are more involved than bind mounts, by watching the previous two videos you have all the pre-requisite information required to grasp this concept.

In this video we work through a bunch of examples to ensure the fundamentals are in place. Volumes will feature heavily throughout the rest of our dealings with Docker, so be sure to understand this section before moving on.

That’s all from me for this week. Until next week, have a great weekend, and happy coding.

Chris

Comedy Errors

The last 4 weeks have been an epic journey. I started off with next to no Docker experience and have finished up with a working Docker-in-production setup.

Along the way I have learned an absolute ton of new stuff. But oh my Lord have I missed writing some code. Any code. Like, I have written absolutely no code in the last 4 weeks, and it’s killing me.

But anyway, I want to burst the bubble. Deploying Docker is not simple. At least, my experience has been anything but plain sailing.

Take for instance the obvious stuff, like having to learn the fundamentals of Docker – from the Dockerfile through to Volumes, and Networking. You need to know this stuff for development, let alone production.

And then there’s the less obvious. The “gotchas”. The ‘enjoyable’ headscratchers that left me stumped for days on end. Allow me to share a couple of comedy errors:

I wanted to run my API and my WordPress site on one of my Rancher hosts. This simply means I have a couple of Digital Ocean droplets that could potentially host / run my Docker containers, and I specifically wanted one of them to run both the API and the WordPress site.

Now, both sites are secured by SSL – a freebie cert from LetsEncrypt. So far, so good.

Both sites using SSL means both need access to port 443.

My initial impression was that I should be exposing port 443 from both containers, and we should be good, right?

No.

Only one of them can use port 443. The other will simply not come online, and the error isn’t very obvious.

No problem, Rancher has a Load Balancer. Let’s use that.

So I get the Load Balancer up, and with a bit of effort, both of my sites are online and I feel good about things.

“Where’s the comedy error?” you might ask. Good question.

This load balancer, it’s pretty useful. Shortly after getting the websites online I’m feeling fairly adventurous and decide to migrate from GitLab on a regular, plain old standalone, Ansible-managed Digital Ocean Droplet to a fully Dockerised, Rancher-managed ‘stack’.

What could possibly go wrong?

Well, it turns out… everything.

Sure, my backups worked, but they kinda didn’t. My Droplet used GitLab CE, but my Docker image is built from source. I don’t know specifically why, but I couldn’t get the two to play ball. No major loss, just 2 years worth of my GitLab down the drain.

I soldiered on. I got GitLab up and running, but this was when the real fun started.

To get my CI pipeline going I needed to host my Docker images inside GitLab. That’s cool, GitLab has a Docker Registry feature baked in as of a late minor release of the 8.x.x branch, and I was rocking GitLab 9.0.5. Also, this was something that was working on my trusty old Droplet.

Of course, this all went totally pear shaped.

It took me a couple of days just to get the SSL certificates to play ball. All the while, my GitLab server wouldn’t show me any of the Docker images I’d uploaded. Fun times. I mean, they were there, but GitLab was just having none of it. Where there any helpful error messages? Of course not.

Ok, I swear the comedy errors are coming really soon.

Anyway, GitLab and the Docker Registry need a bunch of open ports: 80, 443, 5000… and 22.

Sweet, I know how to work with ports, so I’ll just add a bunch more into my Load Balancer and everything “just works”, right? Well, after about 3 more days, yes, everything “just worked”.

Cool.

However, for some reason that totally escapes me now, I needed to SSH into the specific Rancher Host that had my GitLab instance on it. Not the container, the virtual machine / Droplet.

Lo-and-behold, no matter what I tried this just wouldn’t work. I was absolutely stumped.

In Linux-land, particularly on the server, it’s fairly uncommon to reboot. It rarely works quite as well as the usual “turn it off and on again” routine / meme would suggest.

But I tried it. And here’s the really weird part:

I could get in. Boom, I was in. But was it a fluke? I immediately logged out, and sure enough, I couldn’t log in. Same thing. Permission denied (publickey).

What the…

5 hours later I realised the mistake. I had redirected port 22 on the Load Balancer to my GitLab server so I wouldn’t end up with funky looking URLs for my git repos :/

Yep, port 22 wasn’t going to my Rancher Host. Instead, Rancher’s Load Balancer was forwarding port 22 on to my GitLab container.

ARGHHH!

5 hours. Seriously. I wish I was joking.

It’s this sort of thing that’s surprisingly difficult to Google for.

I promised a couple of comedy errors, so here’s the second:

I had gone full-scale cheapskate on my Rancher setup and opted for the 1gb Droplets. 1gb to run multiple instances of MySQL, nginx, PHP, RabbitMQ, Graylog, GitLab.

Yeah? No.

I wanted to push the limits of what Docker could do, and it turns out, Java inside a container is still Java. It will chew through a gig of ram in no time.

I wasn’t overly concerned by that. For you see, I had a cunning plan. And if Baldrick has taught us anything about cunning plans, it’s that they cannot fail.

Being the resourceful young man that I am, I provisioned a third node. A more beefy node. A node that was in fact, my very own computer. Chris, you genius!

Using Rancher’s “scheduling” feature I forced GitLab from the 1gb droplets to instead run exclusively on my machine. All was good.

Until yesterday when my ISP decided to soil itself:

Anyway, during that downtime some gremlins crawled into the system and started tearing apart important and sadly not very backed up pieces of my shiny infrastructure.

Late in the day, my ISP’s hard working network gophers fixed whatever network-related mishap that had broken the Internet and I got back online. Around that time I noticed my own computer was showing as “disconnected” in Rancher. A bit odd, seeing as I was online on this very box.

At this point I should mentioned that I had migrated to GitLab midway through my journey into Rancher. Most of the containers had been provisioned from the original standalone GitLab that I had been using for the last two years. These containers were available via port 4567.

My GitLab Docker container version used port 5000 instead.

Wouldn’t it have been a silly move to reprovision a bunch of my containers at this point, being that my Docker GitLab was playing up, and my old server was no longer available? Yep. Still, I did that anyway. Whoops. I managed to down 2/3rds of my infrastructure. Bad times.

You see, the new Registry container on port 5000 wasn’t up, and couldn’t come up. It needed access to a volume, but the volume was available via NFS on the other node, and connectivity to that node had been lost during the ISP-related downtime.

Not quite understanding the problem with my SSH / port 22 issue, I’d rebooted the other server anyway, and NFS decided not to come back online automatically. Compounded problems, anyone?

Of course, I’d deleted my old GitLab droplet by this point, so the old 4567 registry wasn’t available either… ughh.

Anyway, I’m sure reading this it all sounds… if not obvious, then not that bad. Yeah, I guess not, but like a decent financial savings plan, the real wins are found in compounding. And in my case, it wasn’t so much wins as losses. Many, many small details stacked up to turn a “this will only take me, at most, 2 weeks” to “over 4 weeks and just about getting there”.

It’s been a total mission.

I tell you this as I get so disheartened when I see others say things like this are easy.

It’s not easy. Very little of “development” is easy.

That said, I firmly believe if you have a stubborn persistence, there is actual enjoyment to be had in here somewhere 🙂

Ok, that’s enough ranting from me.

Video Update

This week saw three new videos added to the site:

https://codereviewvideos.com/course/symfony-3-for-beginners/video/learning-a-little-more-about-forms

Again, like last week I will start you off here and let you follow through to the next two videos in the series.

We’re almost ready to get started with the Security portion of this course, where – in my opinion – things get a lot more interesting.

I will leave you this week by saying thank you to everyone who has been in touch – whether via email, comments, or similar – as ever, I am extremely grateful for all your feedback. Thank you.

Have a great weekend, and happy coding.

Chris

Docker In Production – Course Outline

This week I’ve been planning out the new Docker series. There’s a ton of stuff to cover, and I’m not sure whether to start out with the very basics, or dive right into the difficult stuff. One possibility is to split it into two (or more) course, covering different levels of detail.

What I am planning on covering is how to deploy the sort of stack that a small site might need. This includes:

  • Symfony 3
  • MySQL
  • nginx
  • Redis
  • RabbitMQ
  • Graylog

    Being that I love Symfony, it’s probably unsurprising that we are going to use Symfony 3 as the example back end. But in truth, you could swap this part out for anything you like. Hopefully with some of the problems we will encounter in getting a Symfony site online using Docker, then other similar setups will be covered with only minimal modification to the process.

    Then if you go with this, you’d probably want a separate front end site, so:

  • WordPress
  • MySQL
  • nginx

    The MySQL and nginx containers would be completely different from the Symfony stack ones.

    That brings up another issue then – sharing ports. You’re going to hit on issues if you try and re-use port 80 for serving two different nginx containers. At least, I did.

    The solution to this is using a Load Balancer. So we will cover this too.

    With a load balancer in place, we will add in LetsEncrypt to give us free SSL. This will cover both the Symfony stack and the WordPress stack.

    But wait, there’s more.

    We probably want a separate front end stack also. For the app that talks to our Symfony 3 API stack. So we will need to setup this too.

    There’s a bunch of fun challenges in each one of these steps. And by fun I mean “will cost you hours of your life” kinds of fun. Even simple stuff that you likely take for granted can bite you – e.g. how might you run a cronjob in Docker-land?

    Lastly, all of these services would be fairly painful without some kind of deployment pipeline. Thankfully, GitLab has us covered here, so we will also need to add a GitLab instance into our stack. Again, this will be dockerised.

    Oh, and managing this would be a total nightmare without some kind of container orchestration software. We will be using Rancher.

    So, yeah. Plenty to cover 🙂

    But as I say, plenty to cover and that’s without mentioning the basics.

    In other news this week (and some of last), there’s a really interesting read around the forthcoming release of Symfony 4 – (start here http://fabien.potencier.org/symfony4-compose-applications.html)

    I really like the direction that Symfony 4 sounds like it’s taking. I cannot wait to try out Symfony Flex. I’m even going to get back to using Makefiles by the sound of things – though I can’t say I was in love with them the last time I had to use them. That was years ago, mind.

Video Update

This week saw four new, free videos added to the site.

These videos start here:

https://codereviewvideos.com/course/symfony-3-for-beginners/video/walking-through-the-initial-app

And are all part of the same course. This series is a slower paced introduction to Symfony 3, aiming to cover in a little more depth the big questions I had when first starting with Symfony in general.

Whilst we have covered how to create a simple Contact Form before on CodeReviewVideos, this time we are going to use it as the basis for a slightly more interesting series. Once we’ve built the contact form and had a play around with some extra things you might wish to do with it, we are going to move on and secure the contact form.

This will involve implementing some basic user management features – but crucially we are going to do so without resorting to FOSUserBundle.

Now, don’t get me wrong here. I think FOSUserBundle is fantastic and am extremely grateful for its existence. But you may have jumped in and added FOSUserBundle without ever taking the time to figure out how to implement login and registration for yourself. And so this series will aim to cover this.

Ok, that just about covers it from me this week.

Thanks to everyone who has been in touch since last week. I truly appreciate your feedback.

Until next week, have a great Easter Weekend, and happy coding.

Chris